
Sprout Plushie Pattern & Mods Shortcuts: No Sew Swing and more!
PLEASE NOTE: This is NOT the full Sprout Plushie pattern. This pattern is for a revised version of the swing featured in my Sprout Plushie Pattern, which is also, now, provided in the full Sprout Plushie Pattern available in my shops.
Since releasing my popular Sprout Plushie pattern back in 2024, I have made quite a few since for orders, markets, gifts, etc. Having had my fair share of trying to make them in large quantities, I quickly came to realize that there are some pieces of this pattern that can be done quicker, like the swing for example. In this post, I’ll show you how to work my No-Sew Swing pattern for my Sprout Plushie pattern (works with any of the mods too) and how to attach it to your plushie without having to crochet arms.
No Sew Swing Pattern for Sprout Plushies & Mods
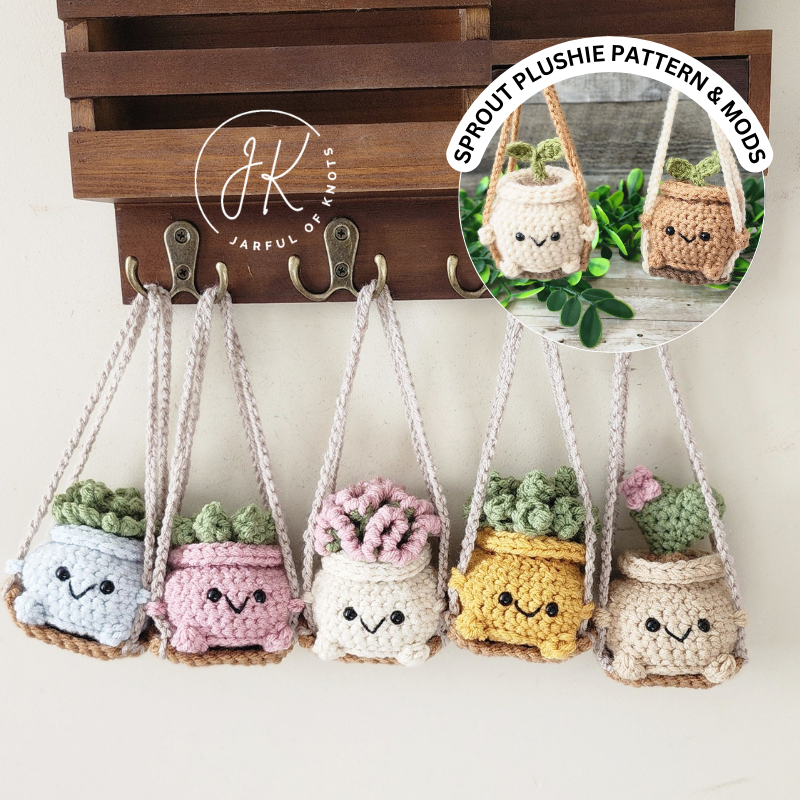
All mods for my Sprout Plushie pattern (pictured) were made using the following shortcuts and it saved me about 10 to 15 minutes of work for each plushie!
Shortcut 1: Using my No Sew Swing Pattern
Shortcut 2: Sewing the front chains of swings to plushies (crocheted arms not required!)
Shop Direct from my website for best prices!
All pattern are also available in my Etsy shop:
First, here’s a little more information about these shortcuts:
Shortcut #1 - No Sew Swing Pattern
For those of you who have already made my Sprout Plushie pattern, you may recall that the swing seat requires sewing the seat together. My initial intentions was to have a thick, sturdy base for the plushie to sit on. However, my no-sew version works just as well because it uses a combination of wide half double crochet stitches (WHDC) for the seat (with long single crochet stitches (LSC) to straighten out the seat edges). WHDC is an easy dense stitch because it is worked in the previous row.
Shortcut #2 - Sew Chains to Plushie (Crocheting Arms NOT Required!)
Another shortcut you may opt to try when making your sprout plushies is sewing the front chains of swing to the plushie, as opposed to crocheting the arms first, then sewing the arms around the chains. My personal preference is to stitch the chains to round 7 (so it sits below the eyes). Chains may be stitched to desired round of plushie, just make sure the stitches are even on both sides.
Overall, these little shortcuts have probably saved me a good 10 to 15 minutes, which may not sound like a lot but when I am making say 10 swinging sprout plushies, that is almost 3 hours of time back! I don’t know if I will go back to making these swinging plant cuties the original way again because the end result is barely noticeable but still just as adorable. You do not have to sacrifice quality when it comes to shortcuts; as they say “Work smarter, not harder!”
These shortcuts will now be included as a free mod for my Swing Pattern in my Sprout Plushie pattern. If you already have my Sprout Plushie pattern, grab your free copy of these short cuts right here!
Did you try these shortcuts? Please leave a comment and let me know or tag me on socials @jarfulofknots; I’d love to see how it came out!
————————————————————————————————————————————————-
No Sew Swing Pattern
Supplies:
1 finished sprout Plushie or mod.
Any yarn and hook of choice
Yarn needle (for attaching swing to plushie).
Abbreviations Used:
CH = Chain
LSC = Long Single Crochet (Insert hook into ST of previous row, YO, pull a loop, YO, pull through both loops)
SC = Single Crochet
ST = Stitch
WHSC = Wide Half Double Crochet (YO, insert hook in between stitch posts of previous row, YO, pull up a loop, YO, pull through three loops on hook)
YO = Yarn Over
Part I - Make Swing Seat
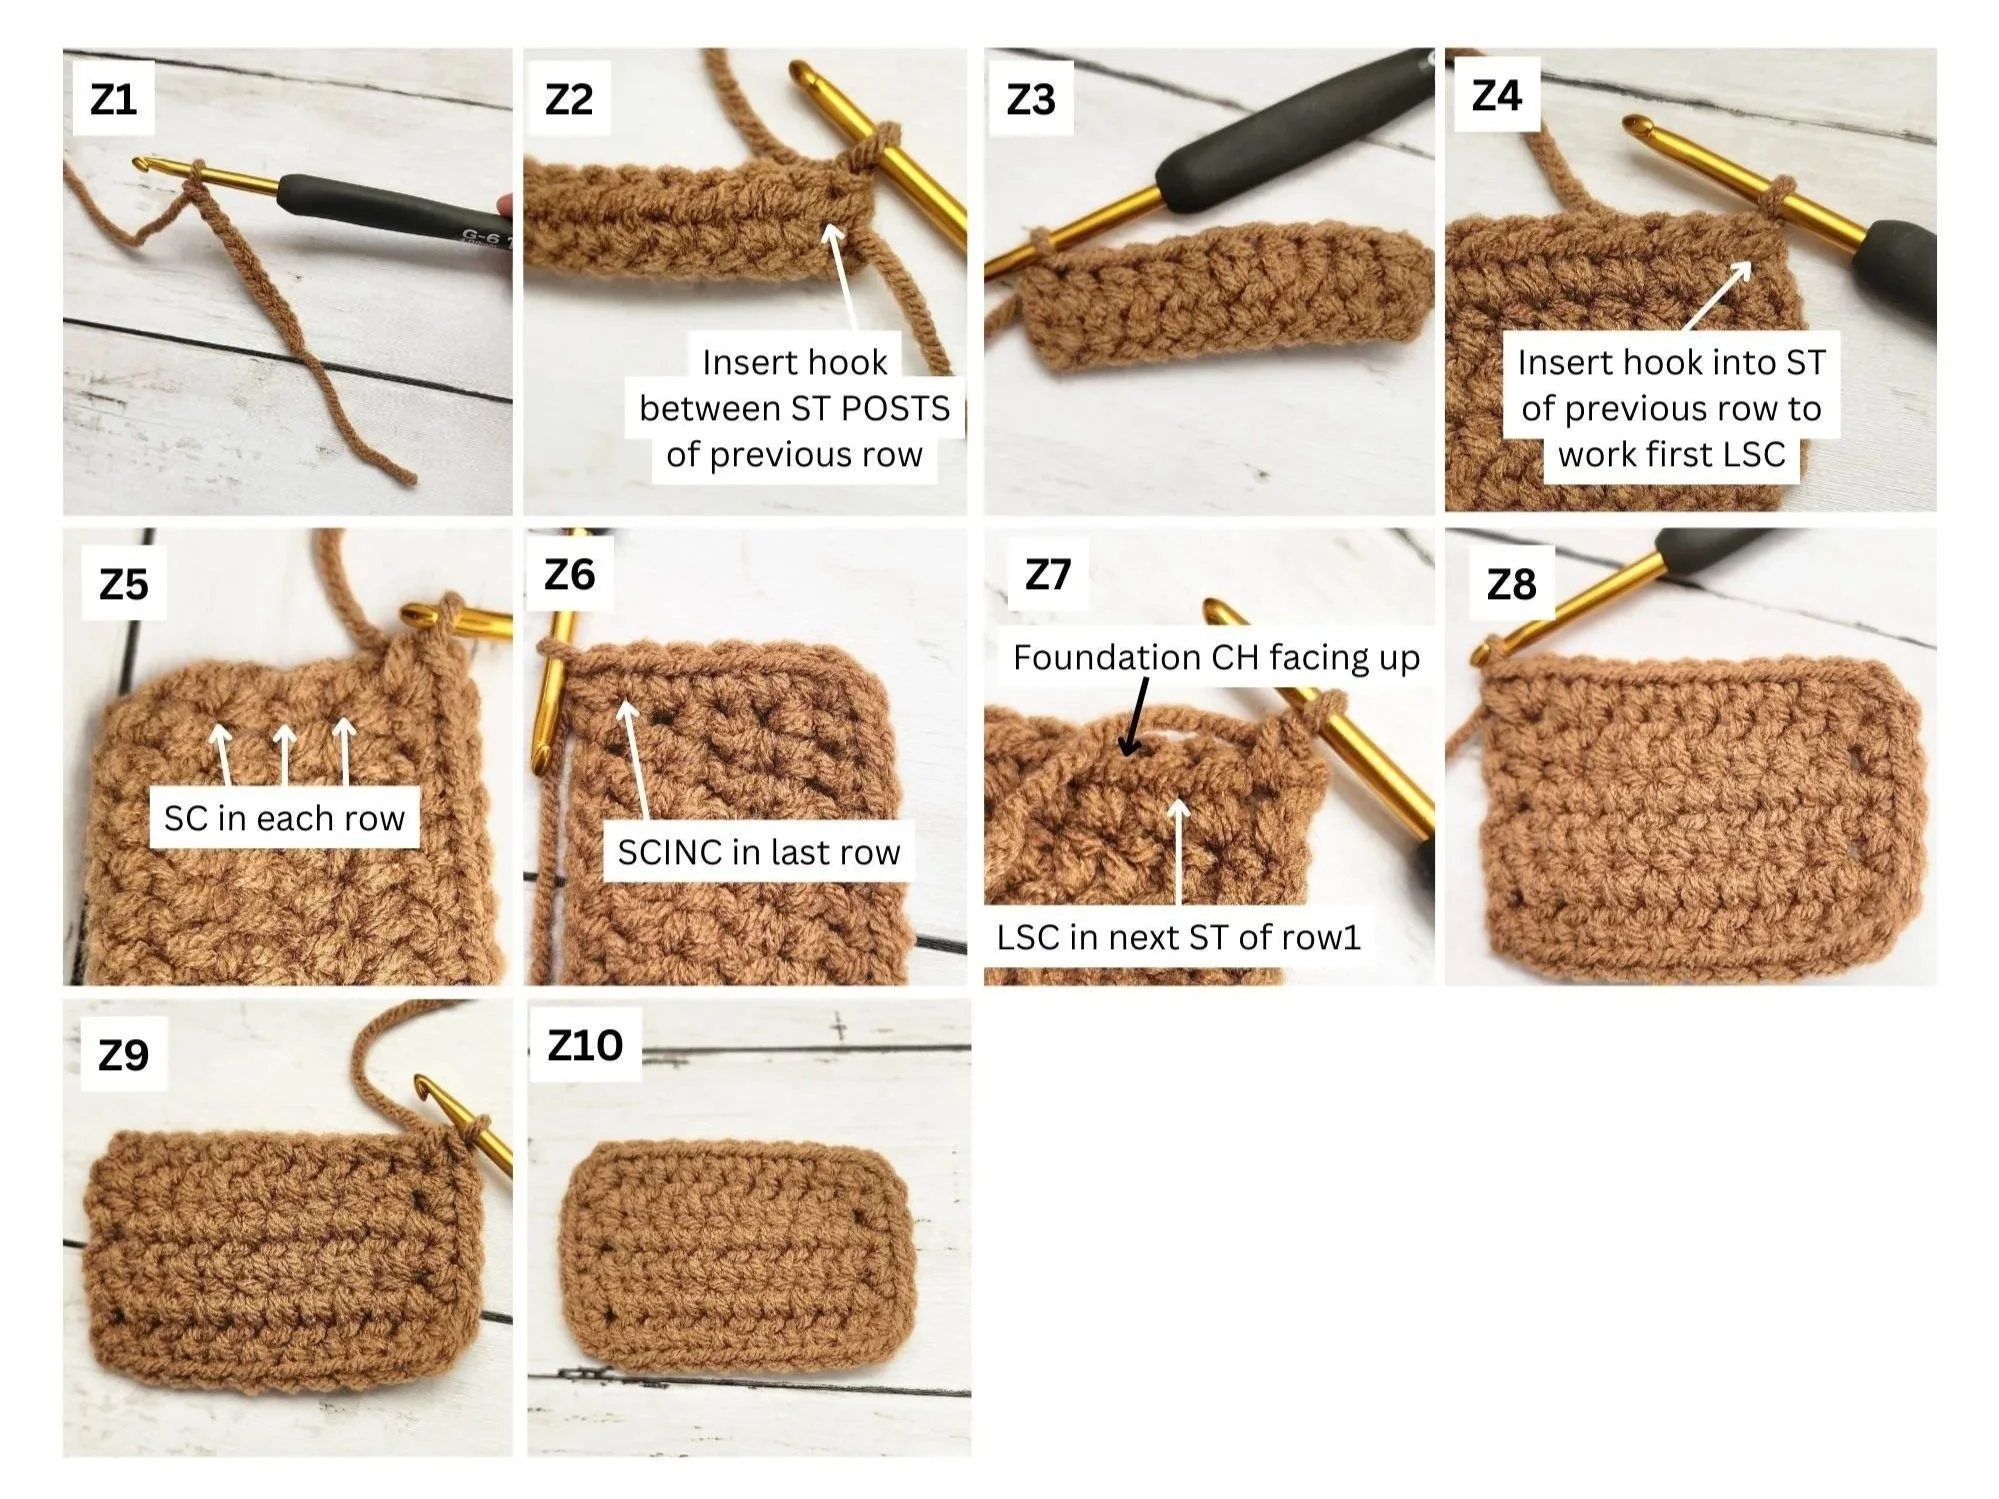
Begin: With brown yarn, CH11 - image Z1.
Row 1: HDC in 2nd CH from hook, HDC x9 across, turn (10 STS).
Row 2: CH1. In first ST, WHDC (YO, insert hook between posts of previous ST - see image Z2, YO, pull a loop, YO, pull through both all loop). WHDC x9 across (10 STS) - image Z3.
Rows 3 & 4: Repeat Row 2 (10 STS per row).
Row 5a: CH1. In first ST, LSC (insert hook into the ST of previous row - see image Z4, YO, pull up a loop, YO, pull through both loops). LSC x8 across, LSCINC in last ST - image Z5 (11 STS).
Row 5b: Turn your work so that the left side of fabric is facing up - see image Z5. *Working in each row, SC x3 down side of fabric* - image Z6. SCINC in last row (5 STS)- image Z6.
Row 5c: Turn your work so that the foundation CH is facing up. To complete first LSC, insert hook into the next ST of row 1, YO, pull a loop, YO, pull through both loops. LSC x8 across. LSCINC in last ST (11 STS) - image Z8.
Row 5d: Turn your work so that the left side of fabric is facing up. Repeat from * to * of Row 5b. SC in last row. SL ST in first LSC of RND 5a - image Z9. FO and weave ends (4 STS) - image Z10.
Images for Part I
Part II - Make Chains for Swing
Front Chain (short chain):
With white or cream yarn, make a slip knot.
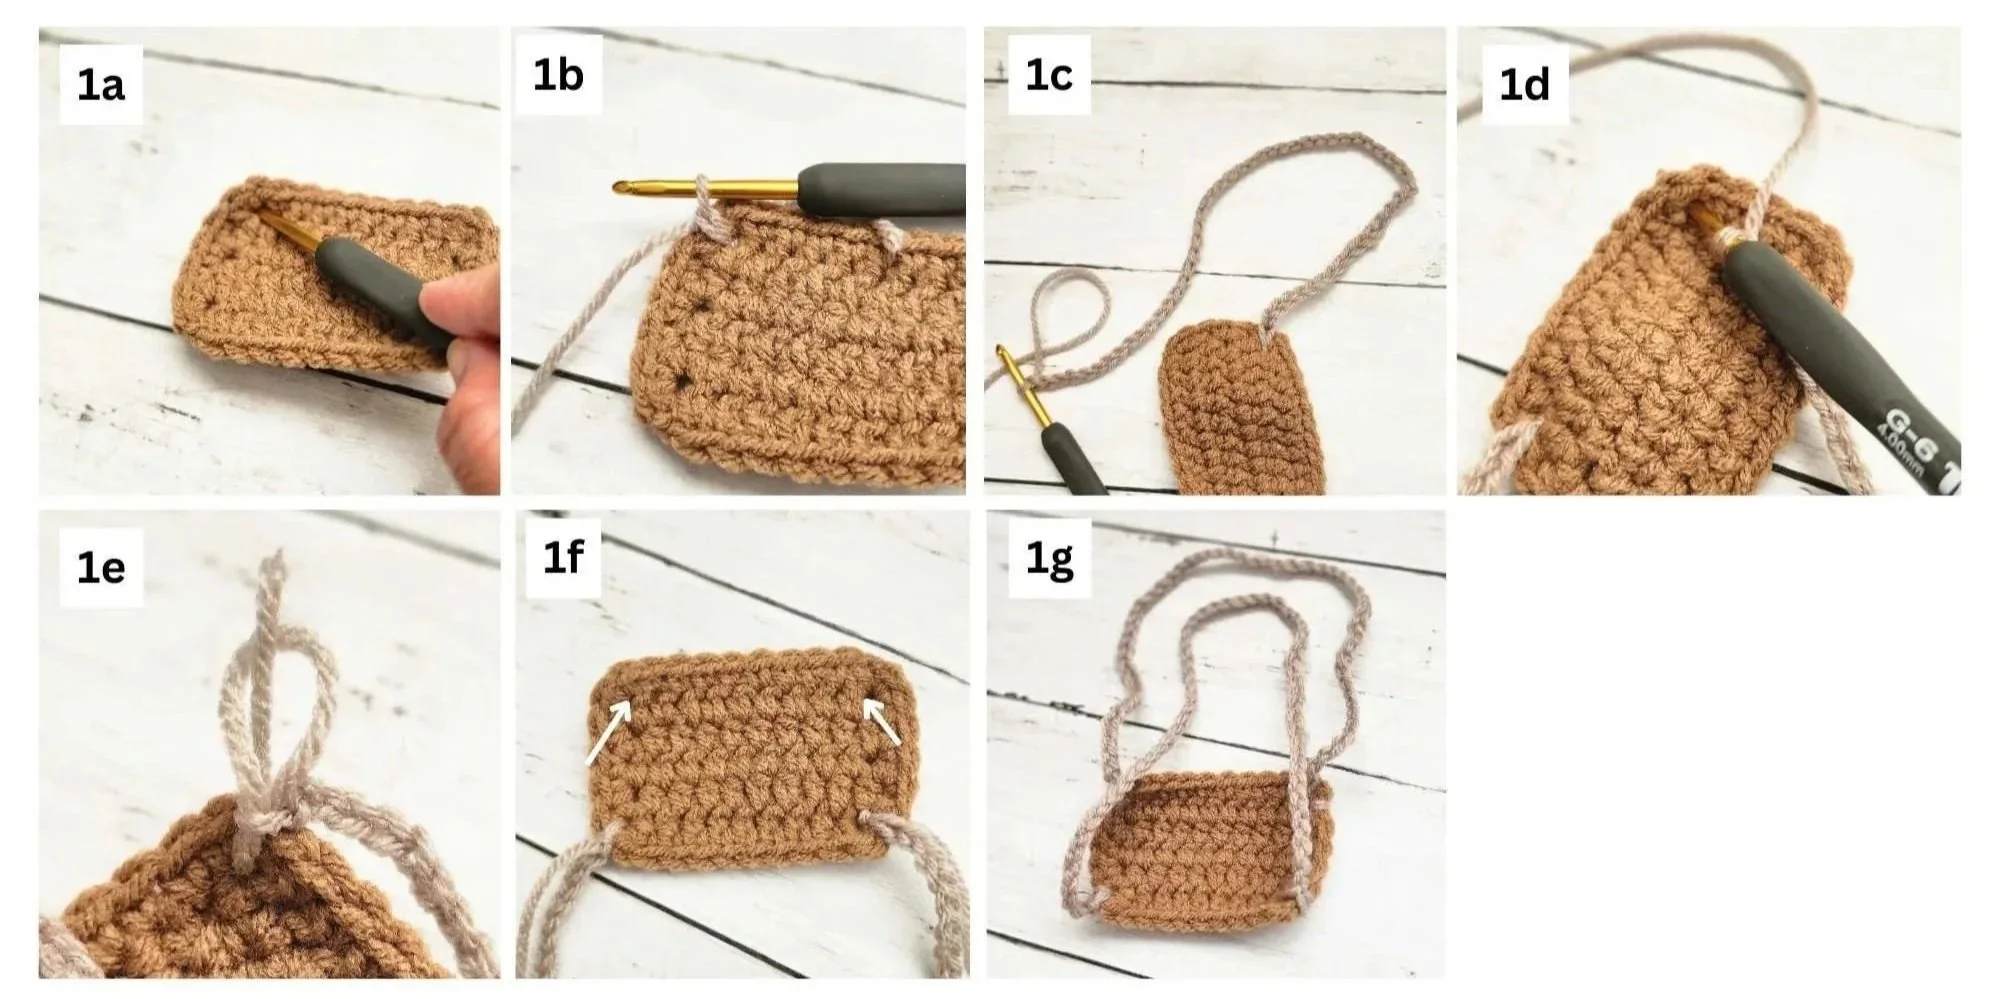
Beginning with any corner of seat, insert hook into the space below the SCINC - image 1a.
*Pull up loop of cream yarn to work a SL ST - image 1b.*
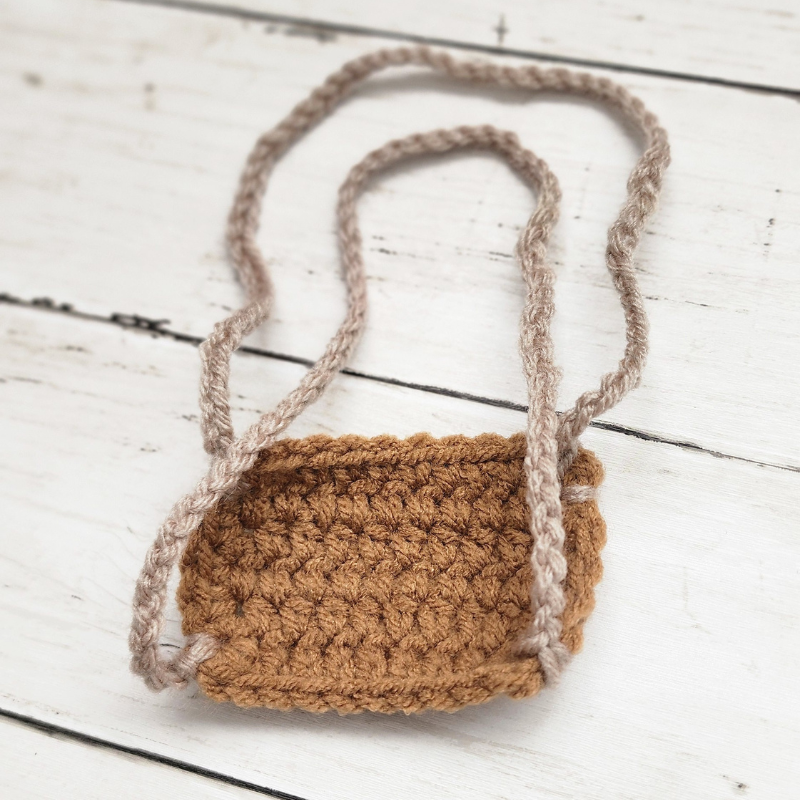
CH56 (or until desired length is reached) - image 1c.
**Working in the corner opposite of the long end of seat, insert hook into the space below the SCINC - image 1d, to work a SL ST.
Fasten off leaving a 6" tail for weaving in. Stretch loop slightly to make it bigger and insert the yarn tail into loop - image 1e. Pull yarn tail to tighten loop. *
Back Chain (long chain):
Beginning with either of the unworked corners of seat, repeat from * to * of front chain - see arrows in image 1f.
CH60 (or until desired length is reached).
Repeat from ** to ** of front chain - image 1g.
Images for Part II
Part III: Attach Swing to Plushie:
Cut a 6 to 8” strand of yarn and thread onto your needle. Working in round 7 (or desired round) on either side of plushie, sew the corresponding side of the front chain to plushie as follows: Leaving a short tail for securing, then *working from behind plushie, insert needle into the plushie to bring yarn over the chain - see image 1.* Repeat * to * x3 or so.
Remove needle from yarn strand and tie both yarn tails together. Use hook to retract extra yarn strands into plushie - see image 2.
Repeat steps 1 and 2 with unworked side of plushie, making sure both sides align. - see image 3.
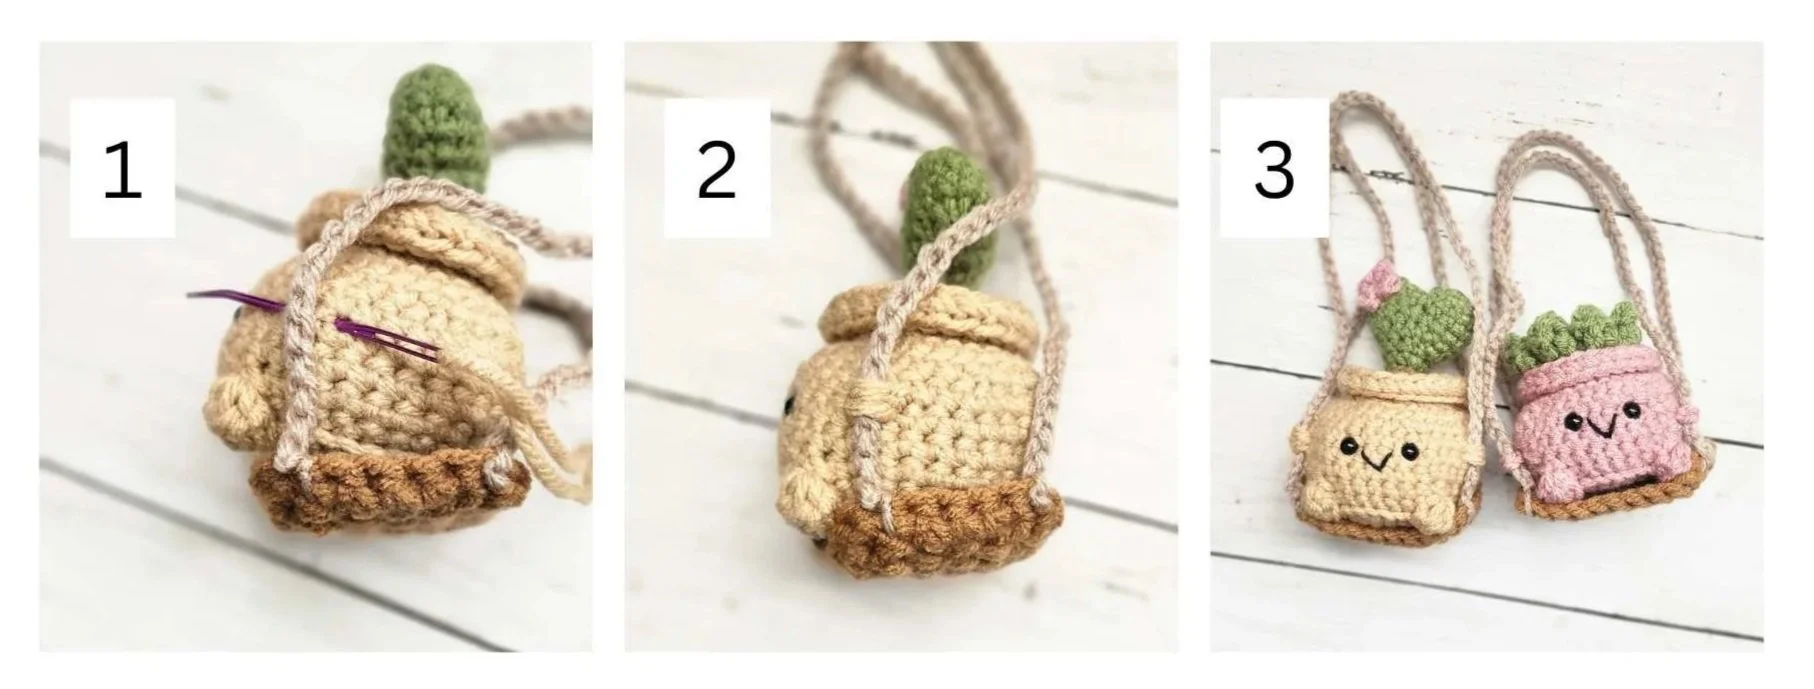
Attach Swing to Plushie
Related Posts
Copyright © Jarful Of Knots 2026. All Rights Reserved.
No part of this digital file or pattern may be copied, altered, sold nor redistributed without written consent from the author. However, you may sell the finished products made from this pattern. Please give credit to @JarfulOfKnots as the author/designer and a link to my page: www.jarfulofknots.com; Please refer to our Terms of Service.