
free clover mod for sprout plushie pattern
PLEASE NOTE: This is NOT a full pattern. My Sprout Plushie Pattern is required to work this free mod.
This page includes affiliate links.
Since releasing my Sprout Plushie pattern over a year ago, it has continued to be my best-selling pattern as well as most popular item at my markets. I love how this pattern started out as a little “sprout” and began to “grow” it into different mods! I really wish I could say I had planned it all out that way but, in all honesty, it just happened that way.
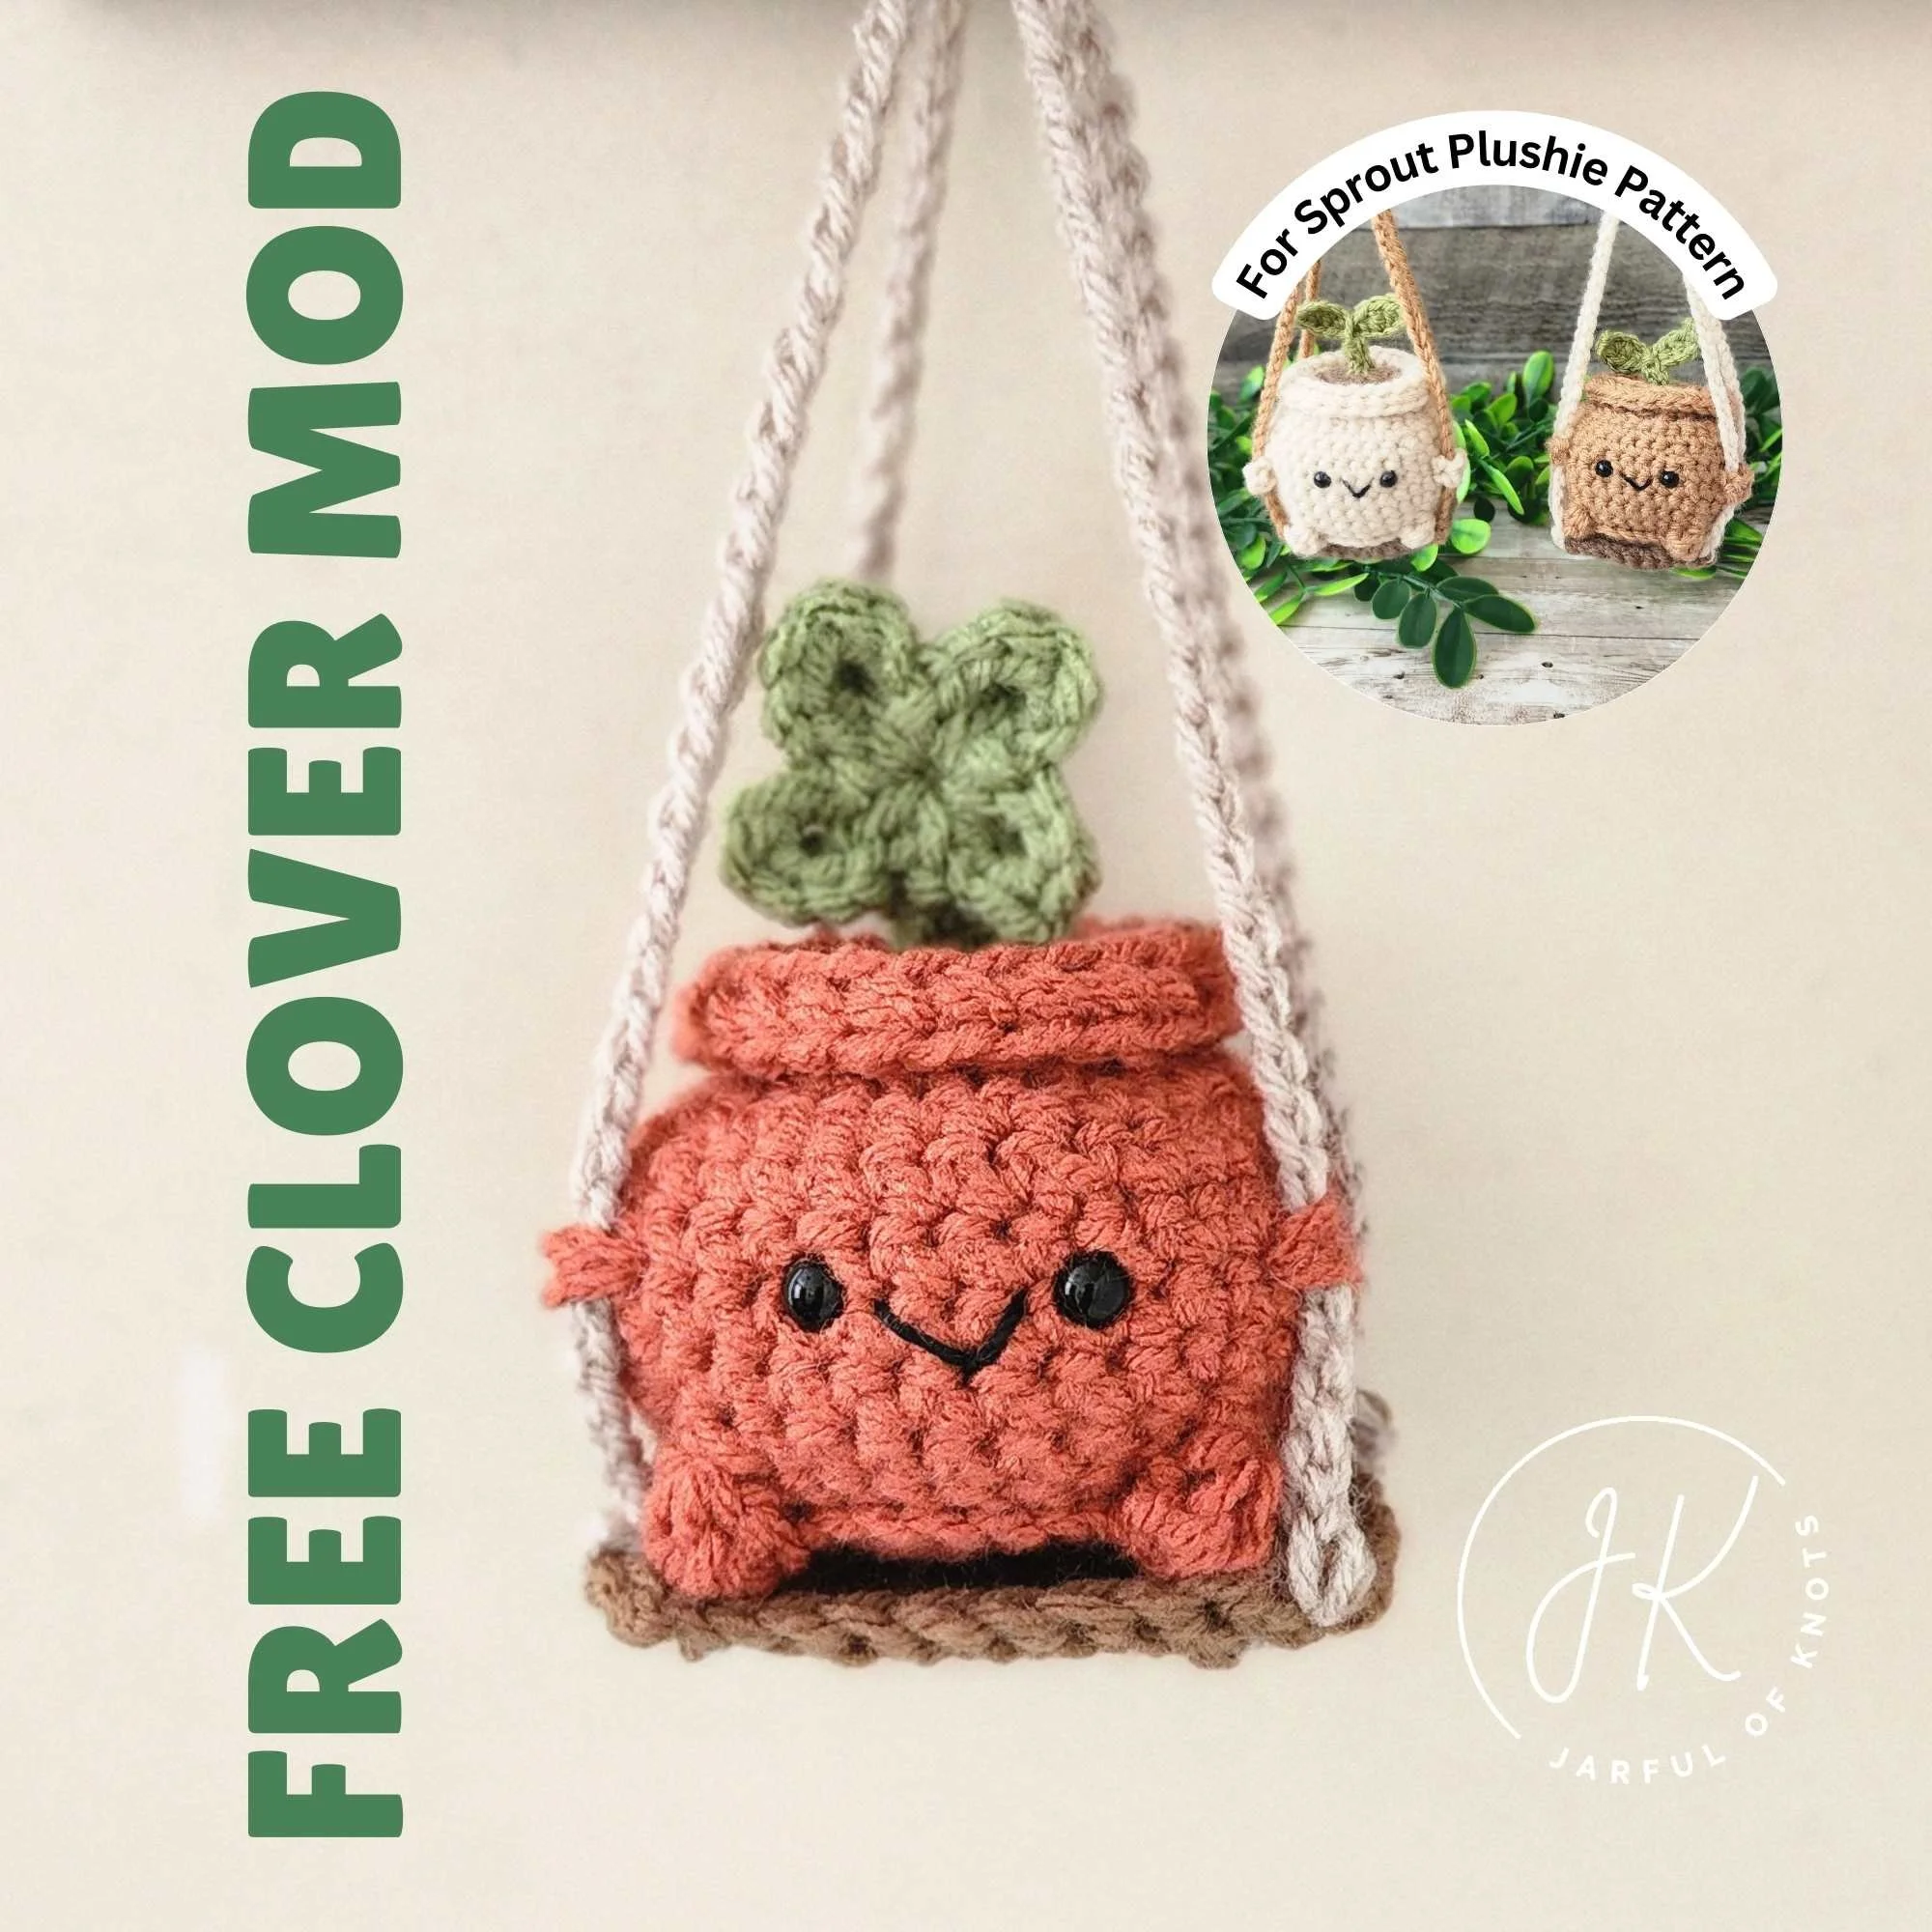
With St. Patrick’s Day and spring coming up, this free clover mod for my Sprout Plushie pattern brings both of those things together. Please note that this is NOT a full pattern and a copy of my Sprout Plushie is required to work this mod. This clover can be made into either a 3-leaf or 4-leaf clover (as pictured). Staying true to my Sprout Plushie pattern, this mod works with any yarn! If you try it out, please leave a comment below or tag me on socials, I’d love see how it came out :D.
Happy almost spring!!
THIS IS NOT A FULL PATTERN
A copy of my Sprout Plushie Pattern is REQUIRED to work this mod; Full digital PDF pattern of Sprout Plushie is sold separately in my shops:
Pictured:
Clover Mod for Sprout Plushie using worsted medium weight #4 100% acrylic yarn with 4mm hook, 7mm safety eyes, No Sew Swing from my blog. I then sewed the front swing chain to plushie (as opposed to crocheting arms, per original pattern) - see previous post for shortcuts!
Clover Mod For Sprout Plushie Pattern
Supplies:
Any green yarn of choice (I used Premier Basix - worsted #4)
Any hook size of choice (I used 4mm)
Yarn needle
1 Finished Plant Pot from my Sprout Plushie Pattern
NOTE: 7mm safety eyes used for pot
1 Finished “soil” from my Sprout Plushie Pattern
Optional:
1 Finished swing from Sprout Plushie Pattern
Black embroidery thread for smile
Abbreviations Used:
BLO = Back loop only
CH = Chain
FLO = Front loop only
FO = Fasten Off
MR = Magic Ring
ST= Sitch
SL ST = Slip Stitch
TR - Treble Crochet
RPT = Repeat
YO = Yarn Over
Notes:
This clover can be made into either a 3-leaf or 4-leaf clover.
The clover pattern is worked beginning with the leaves, down to the stem.
Special Stitch Reference:
Treble Crochet (TR): YO x2, insert hook into ST then, *YO, pull through 2 loops* x2, YO, pull through remaining 2 loops.
Part I: Make Clover Leaves
Work a MR and CH2.
In MR, DC2 + CH2 + SL ST.
Choose from one of following options before proceeding to Part II.
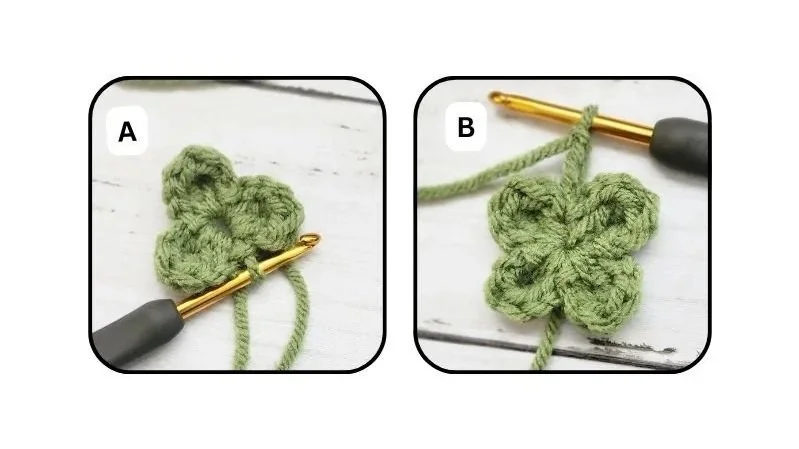
To make 3-leaf clover: *In MR, DC2 + CH2 + SL ST* x2 - image A.
To make 4-leaf clover: *In MR, DC2 + CH2 + SL ST* x3 - image B.
Part I Images
Part II: Make Clover Stem
CH5 - image B.
SL ST in 2nd CH from hook, SL ST x3 across CH - image C.
Insert hook into MR and SL ST - image D.
Insert hook into the BLO of previous SL ST and FLO of the corresponding SL ST on opposite side of foundation CH - image E, YO, pull through all 3 loops.
Working in the BLO and FLO of corresponding SL ST on opposite side of foundation CH down, SL ST x2 - image F.
FO, leaving a 6 to 8" tail for assembly - image G.

Part II images
Part III: Assembly & Finish
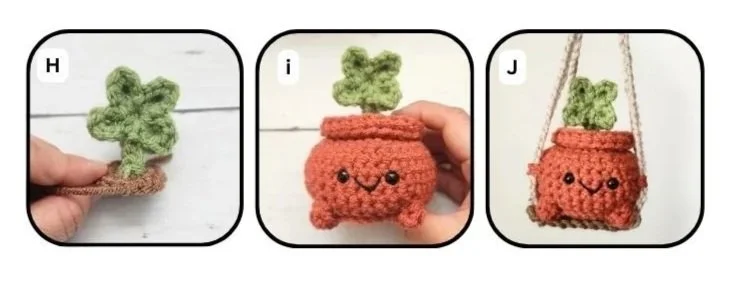
Sew clover into the rnd 1 of soil - image H.
Follow instructions for “Assembly” from Sprout Plushie Pattern - image I.
If Using Swing:
Optional - Follow instructions for making “arms for swing.”
Follow instructions for how to attach plushie to swing - image J.
Part III images
Congratulations, your clover plushie is now complete!
Copyright © Jarful Of Knots 2026. All Rights Reserved.
No part of this digital file or pattern may be copied, altered, sold nor redistributed without written consent from the author. However, you may sell the finished products made from this pattern. Please give credit to @JarfulOfKnots as the author/designer and a link to my page: www.jarfulofknots.com; Please refer to our Terms of Service.