
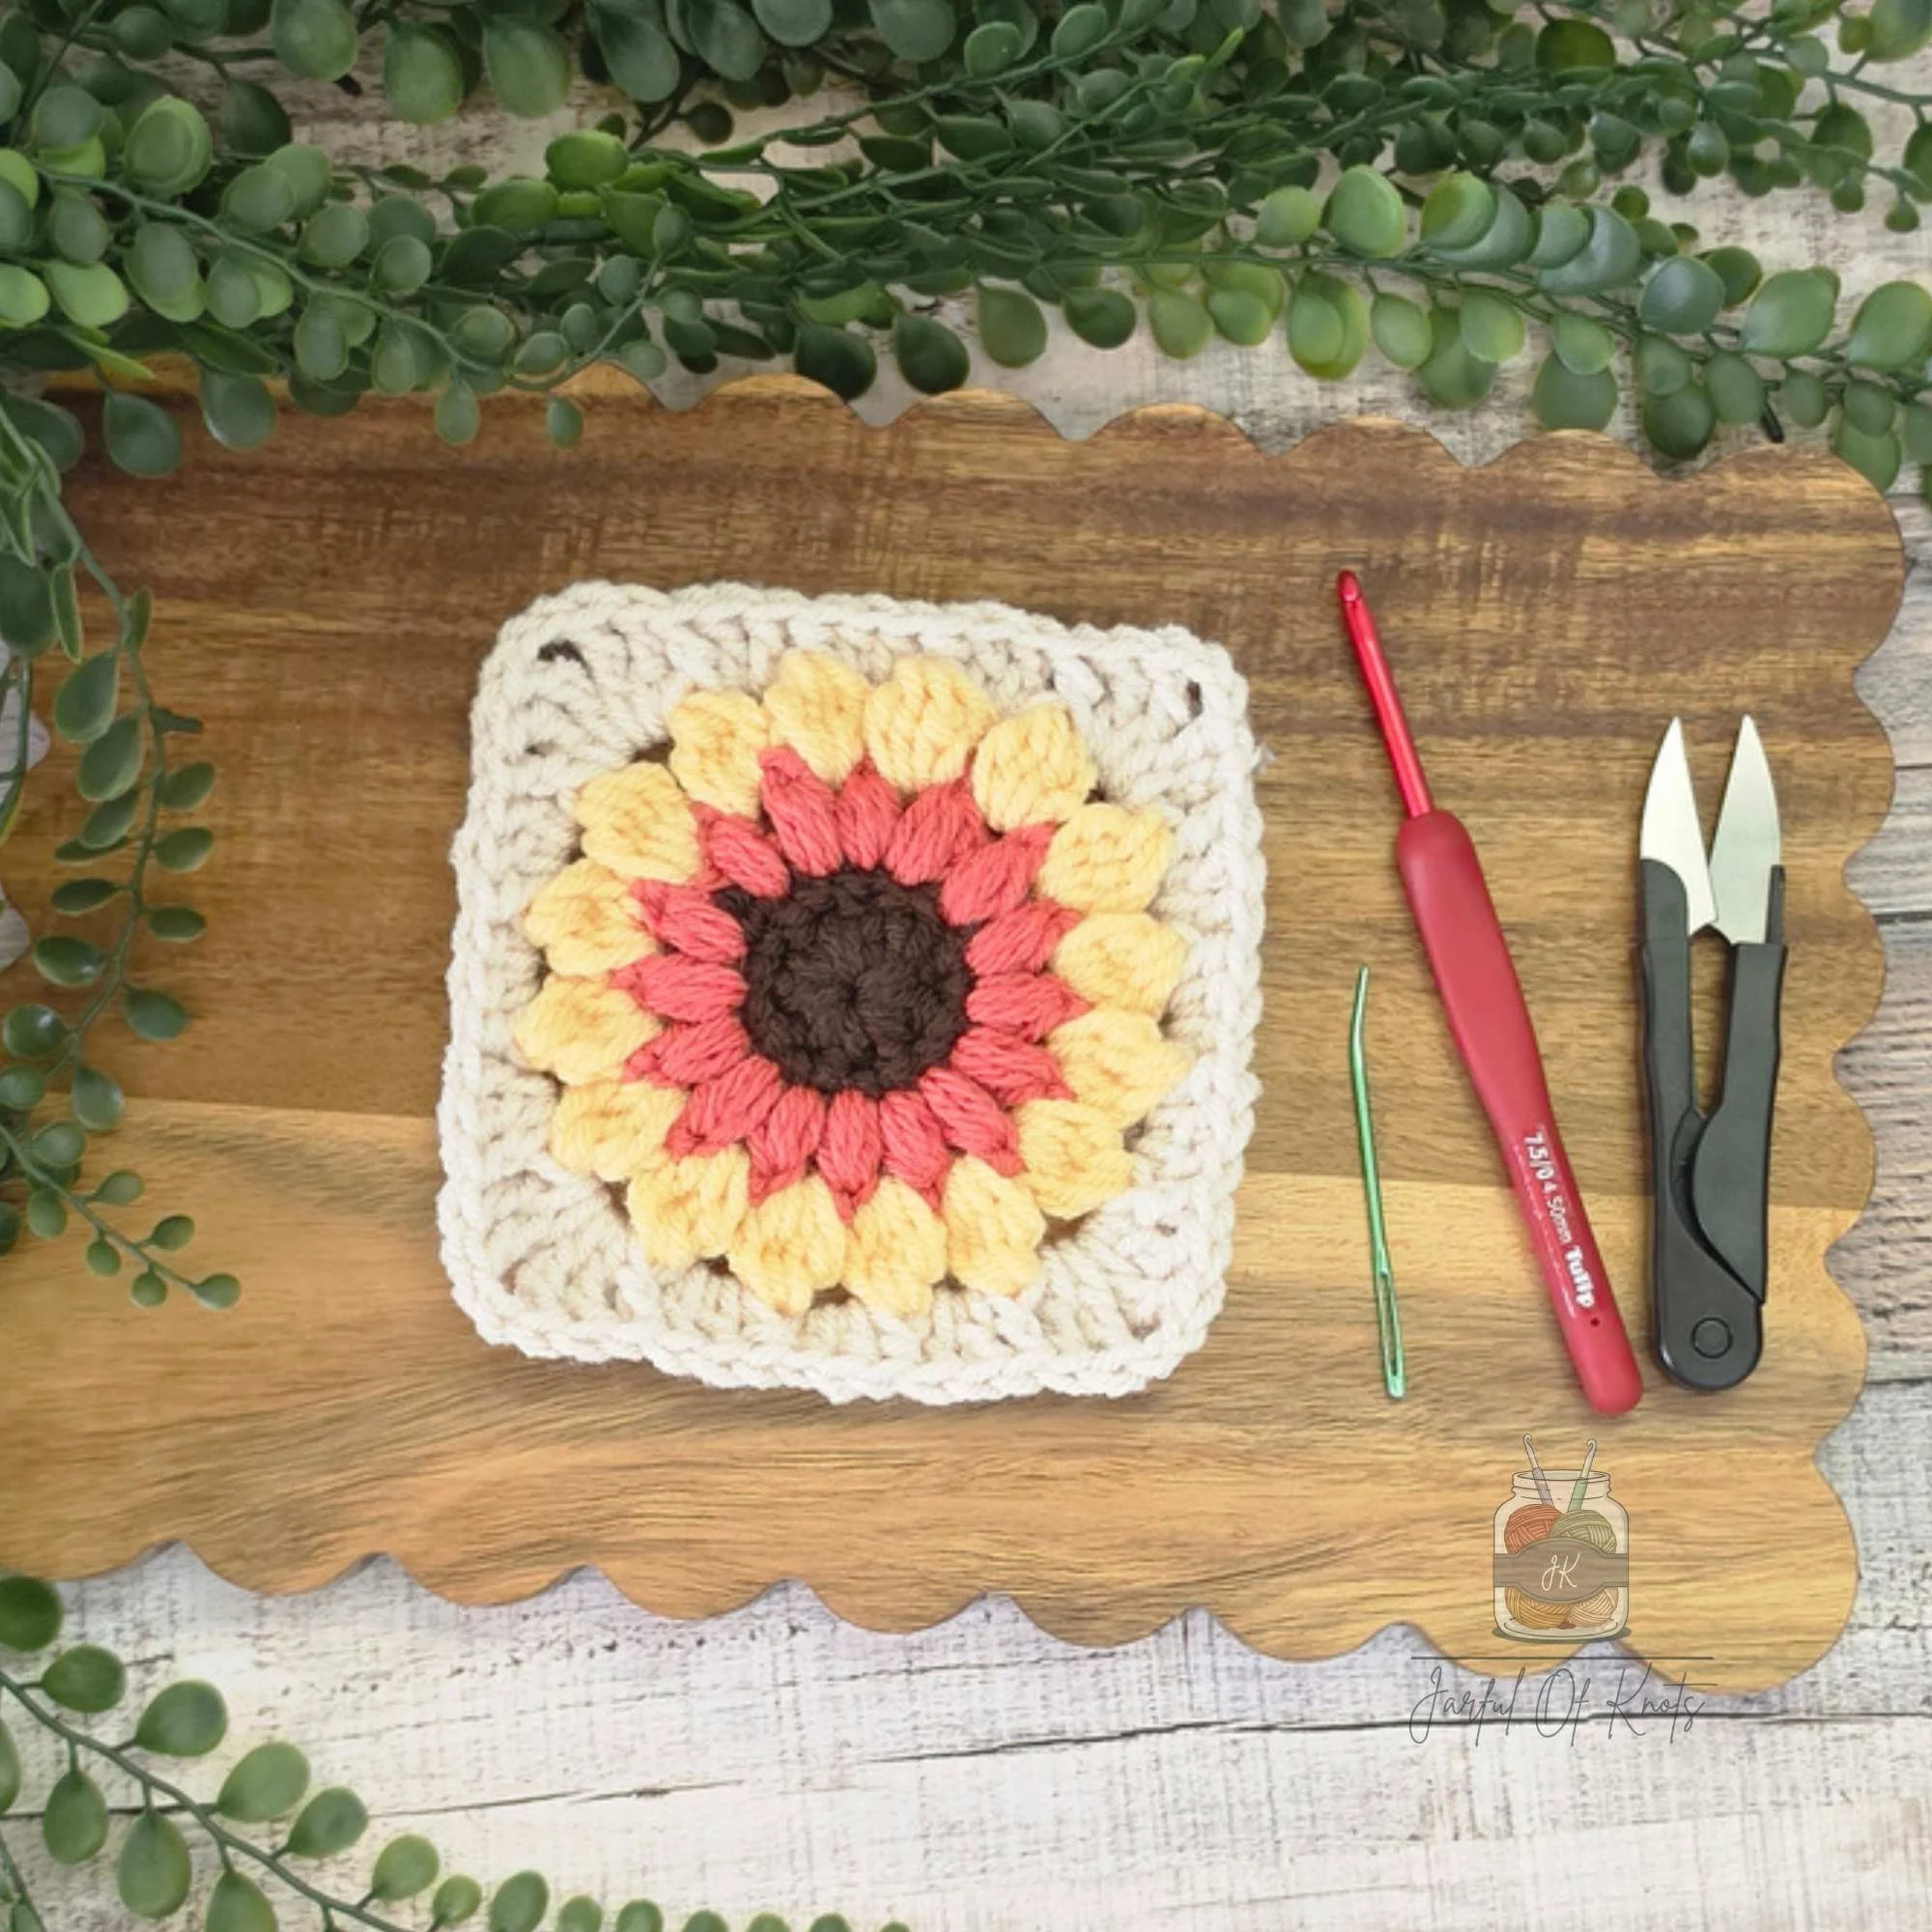
Sunflower granny square Crochet Pattern (with minimal holes)
This post includes affiliate links.
Nothing says “retro” like a good old fashioned crocheted granny square but I wanted to make one without so many holes so I used the front post stitch around each “petal” of the sunflower and this was the end result. Yes there are still holes but it produces a tighter, less "holey" finish, in my opinion.
If you try this out, please feel free to leave a comment below and let me know how it came out :D
Happy Crocheting!
Pattern & Video Tutorial for my
Sunflower Granny Square with Minimal Holes
Sunflower Granny Square Crochet Pattern
LEVEL: Beginner Friendly
FINISHED DIMENSIONS: Around 6” x 6”
GAUGE: 14 Half Double Crochet stitches & 10 rows = 4” x 4″
NOTE: I worked a chain 1 at the end of each row.
SUPPLIES
Any medium weight #4 yarn in up to 4 colors
Colors I used:
Color 1 = Caron One Pound in Espresso
Color 2 = Caron One Pound in Light Terra Cotta (discontinued)
Color 3 = Premier Basix in 1115-60 Maize
Color 4 = Caron One Pound in Off White
Optional but recommended: Blocking Board
ABBREVIATIONS, STITCHES USED, AND SPECIAL STITCH REFERENCE:
C1, C2, C3, C4 = Color 1, color 2, color 3, and color 4
CH = Chain
CL ST = Cluster Stitch - worked as follows:
[YO, insert hook into ST, YO, pull through 2 loops] x4, YO, pull through all 5 loops, SL ST to close CL ST.
DC = Double Crochet
FPDC = Front Post Double Crochet
FPHDC = Front Post Half Double Crochet
FO = Fasten Off
HDC = Half Double Crochet
PS = Puff Stitch; worked as follows:
[YO, insert hook into ST, YO, pull up a loop] x3, YO, pull through all loops, SL ST to close.
MR = Magic Ring
RPT = Repeat
RND = Round
SC = Single Crochet
SCINC = Single Crochet Increase
SK = Skip
SP or SPS = Space or Spaces
TR= Treble Crochet
YO = Yarn Over
YU = Yarn Under
NOTES:
The CH(s) at the beginning each round does not count as a ST unless noted.
After fasting off old colors, ends may be woven in or worked into the next round as you go.
INSTRUCTIONS:
Begin: With C1, work a MR and CH1.
RND 1: Work 8SC in MR, tightening MR as needed, as you go. SL ST in first SC to join (8).
RND 2: CH1, work 8HDC in MR (working over the RND1). SL ST in first HDC to join (8).
RND 3: CH1, SCINC YU in same St as CH 1. SCINC YU x7 in remaining STS around. SL ST in first HDC to join. FO and weave ends or work ends into next RND as you go (16).
RND 4: With C2, work a slip knot. Insert hook into any ST of RND 2 and pull up loop of C2 to CH2 (counts as beginning of PS) then [YO, insert hook into same St as CH2, YO, pull up a loop] x2, YO, pull through all 5 loops. SL ST to close.
[ST, PS +CH1] x15 in remaining CH1 SPs around. SL ST top of PS to join, FO and weave ends or work ends into next RND as you go (16).
RND 5: With C3, work a slip knot. Insert hook into any CH1 SP and pull loop of C3 to CH2 (counts as part of CL ST). [YO, insert hook into CH1 SP, YO, pull up through 2 loops] x3, YO, pull through all 4 loops on hook, SL ST to close CL ST + CH1.
[CL ST+ CH1] x15 in remaining CH1 SPs around.
SL ST top of first CL ST to join. FO and weave ends or work ends into next RND as you go (16).
RND 6: (Note: A comma indicates to work in the next ST or CH SP)
With C4, work a slip knot.
Work sides as follows (ST count for each side will be indicated in parenthesis ( ) at end of side.
Side 1: Insert hook into any CH1 SP and pull up loop of C4 to CH3 (counts as first TR). In same CH1 SP as CH2: Work TR + CH2 + 2TR. FPDC in next ST, 2DC in CH1 SP. Working across: FPHDC, 2HDC, FPHDC, 2DC, FPDC, 2TR + CH2 + 2TR (18).
Side 2: FPDC, 2DC, FPHDC, 2HDC, FPHDC, 2DC, FPDC, 2TR + CH2 + 2TR (18).
Side 3: RPT side 2 (18).
Side 4: FPDC, 2DC, FPHDC, 2HDC, FPHDC, 2DC, FPDC (10)
SL ST top of CH3 to join. FO and weave ends (64 total STS).
Congrats your sunflower granny square is done!
Blocking your granny square is highly recommended to use for projects. Here is blocking board I use.
Copyright ©Jarful Of Knots 2026. All Rights Reserved. This pattern is for personal use only. No part of this digital file or pattern may be copied, altered, sold nor redistributed without written consent from the author. However, you may sell the finished products made from this pattern. Please give credit to @JarfulOfKnots as the author/designer and a link to my page: www.jarfulofknots.com