I’ve had a “Build Your Own (BYO) Sushi” plushie idea for a pattern and this BYO Nigiri Kitty pattern was the result; I just love how it came out! My initial intention in designing this pattern was so makers could offer a “BYO Nigiri Kitty” station at their markets but I also figured, “Why not sell the whole set as a boxed set?” It so happened that I have had these 6” x 6” clear acrylic boxes on hand and they ended up being the PERFECT size for the Kitty plushie and the “toppings!” This post will take you through what I did to make my custom packaging for my BYO Nigiri Kitty sets; I hope you find some inspiration! Scroll to bottom for video.
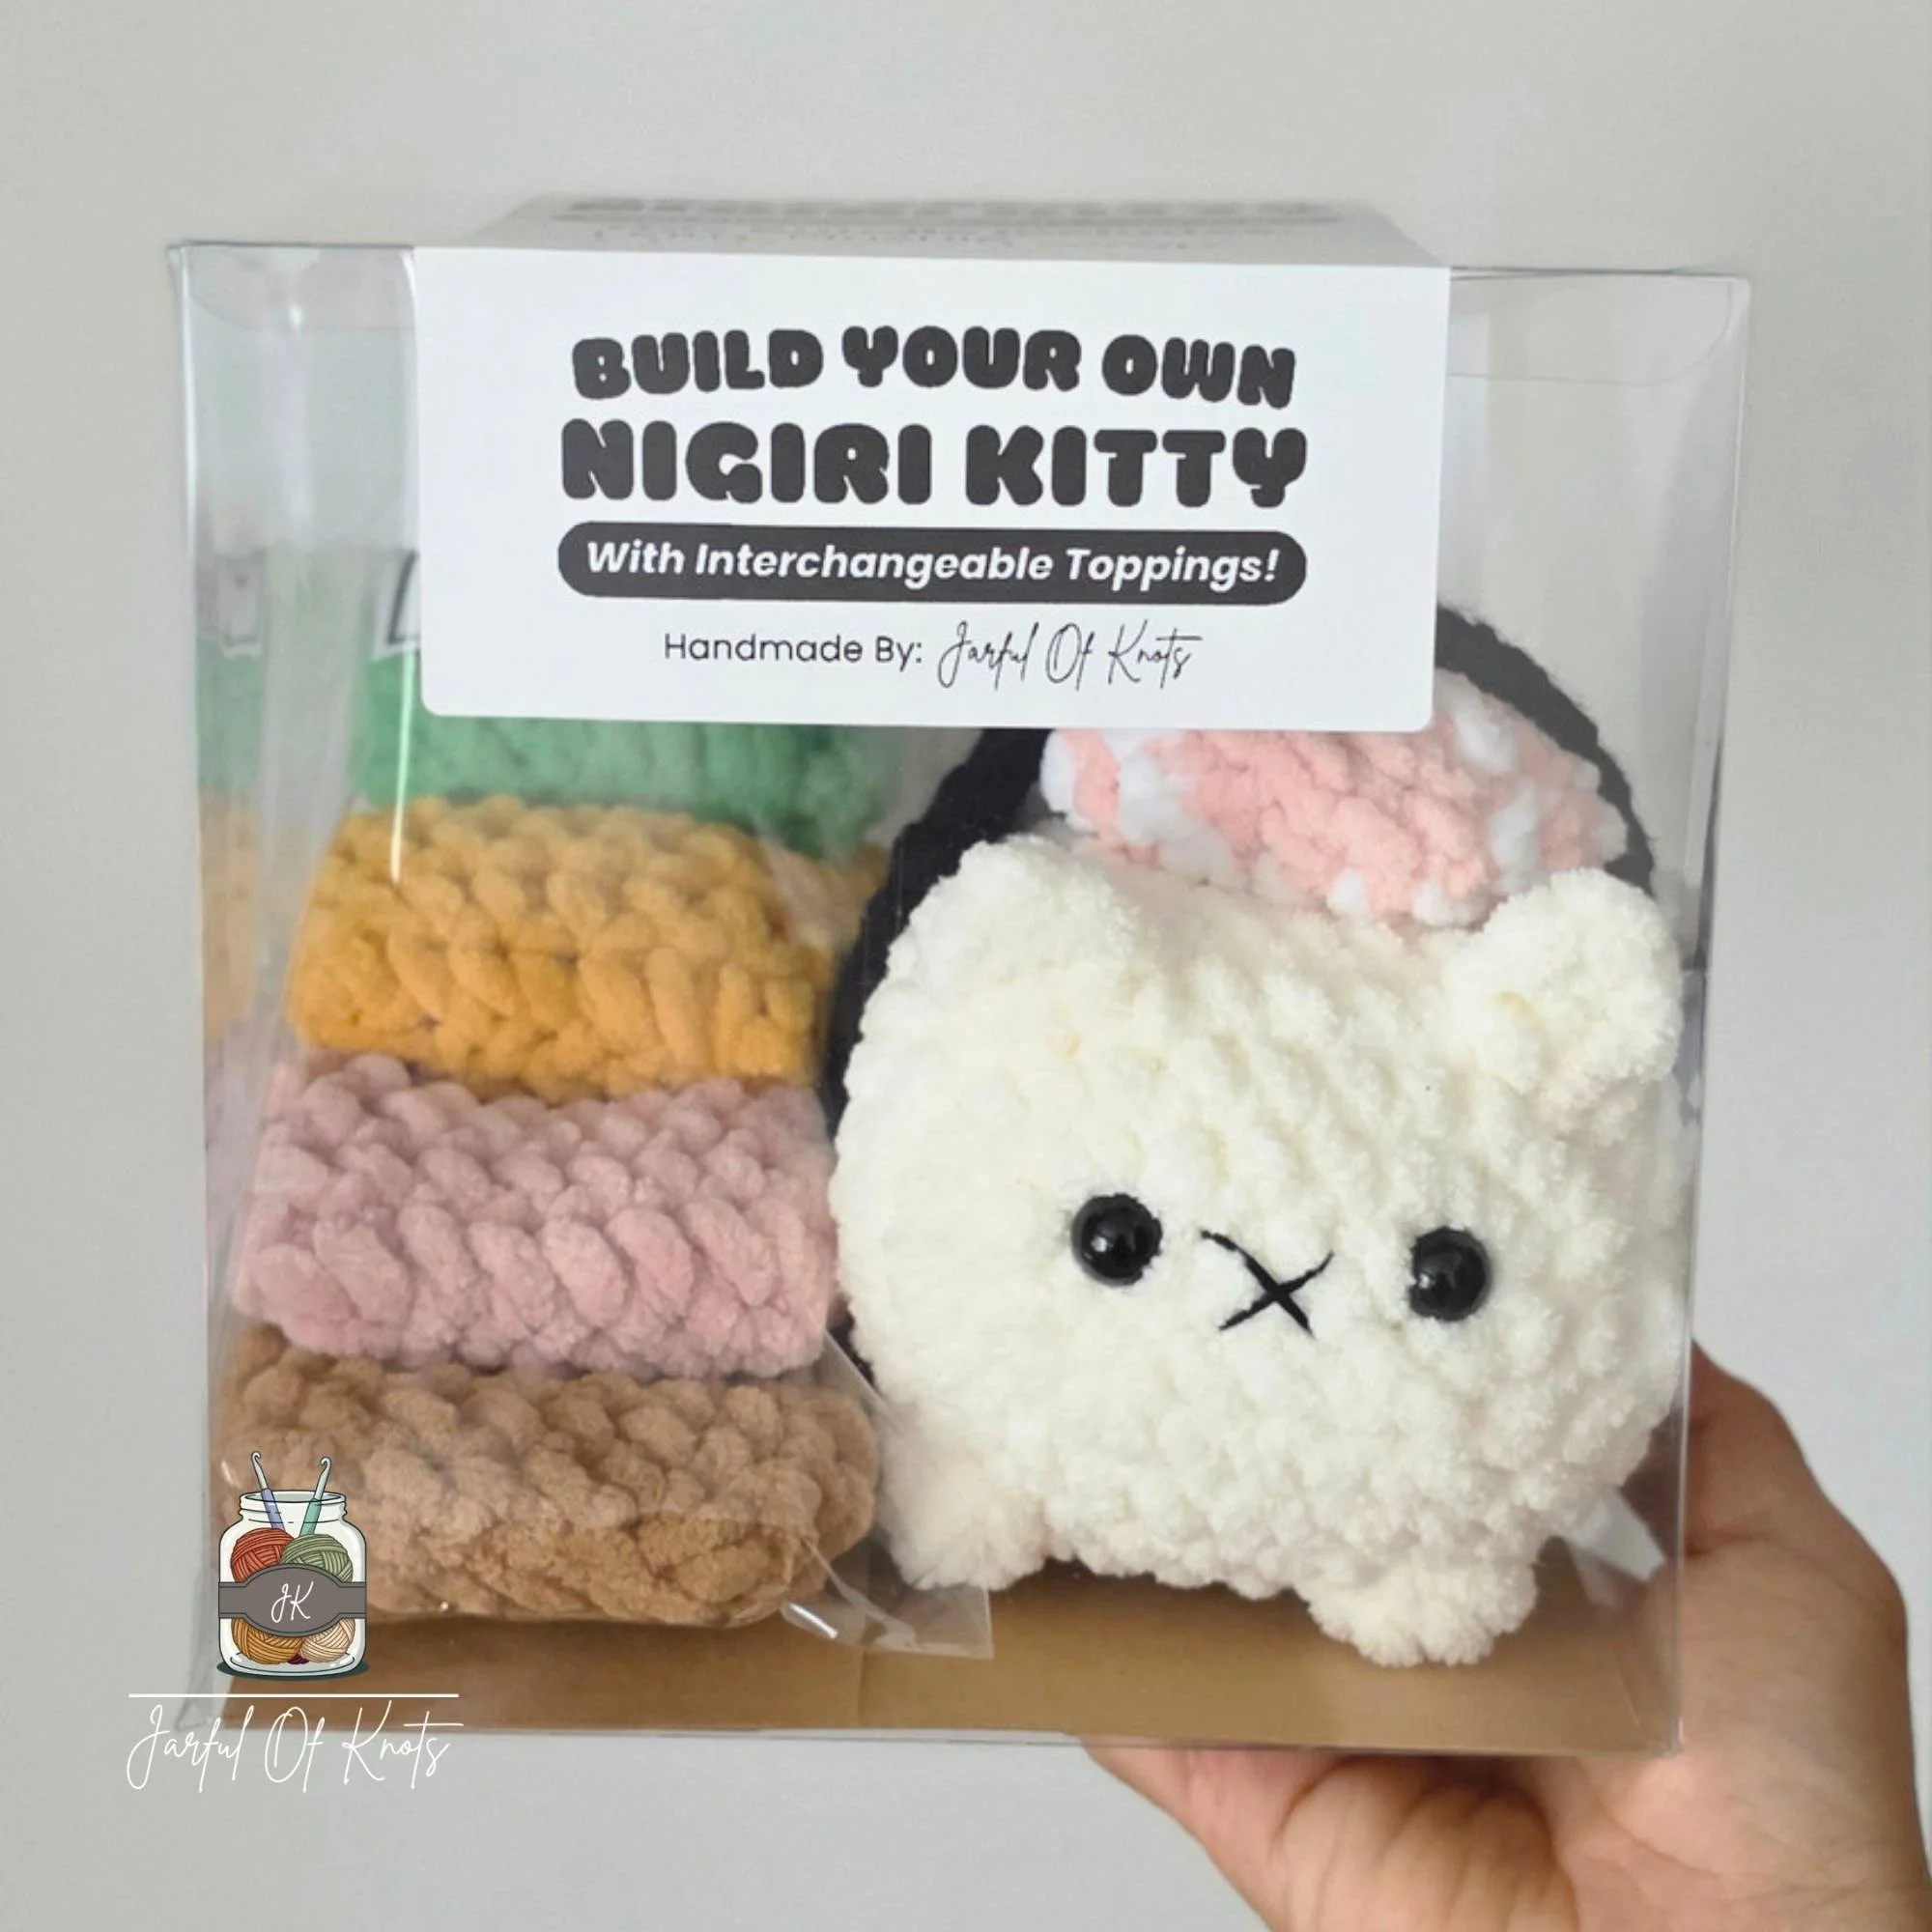
BYO Nigiri Kitty Pattern by me, coming soon!
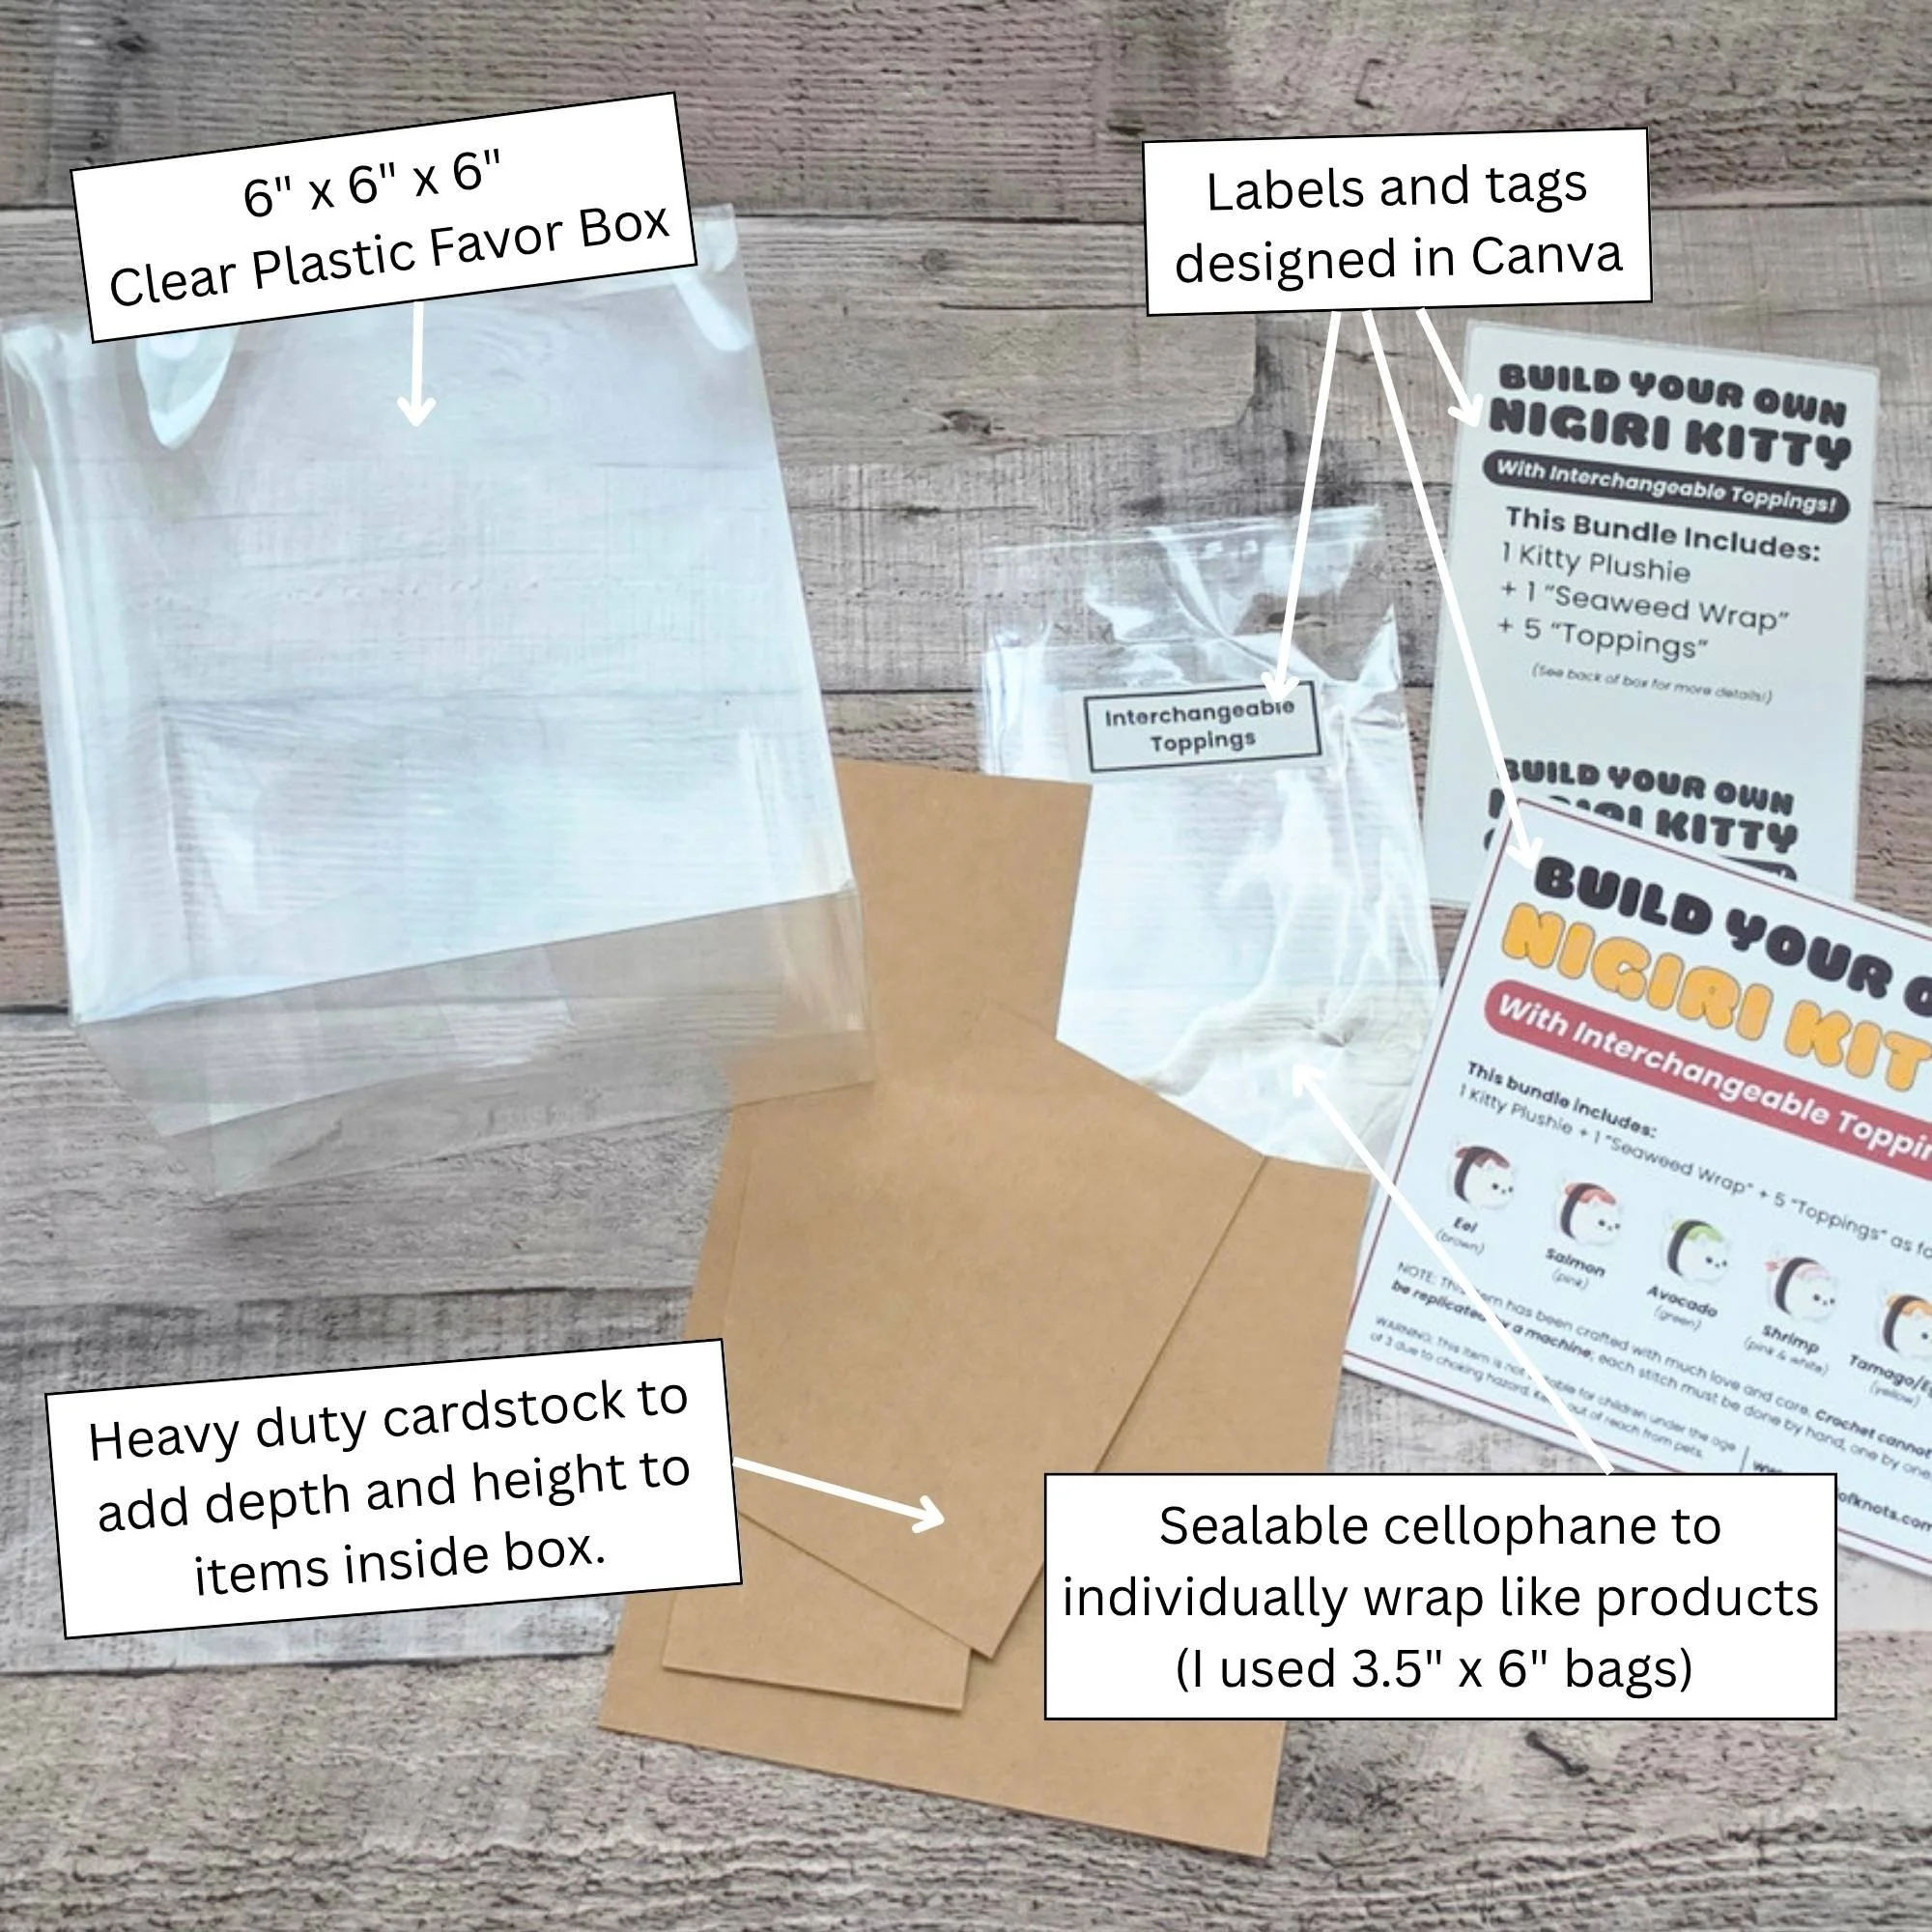
Supplies Used:
Affiliate links are included
6” x 6” x 6” clear acrylic boxes (NOTE: These are a little flimsy but in my honest opinion, they handled the job just fine and worked out for me!)
If the above are no longer available, you may try these on Amazon (these have a handle too so that would be fun!)
Heavy Duty Kraft Cardstock - for base of container and to add height/dimension to products
Double side tape or clear tape
Color printer (I have and use the Epson EcoTank ET 2800)
Thermal label printer for printing box label
4”×6” thermal shipping labels - for printing box label
3.5” x 6” sealable cellophane bags
Here is a step by step on how I created this packaging:
Step 1: I used Canva to design the tags/labels:
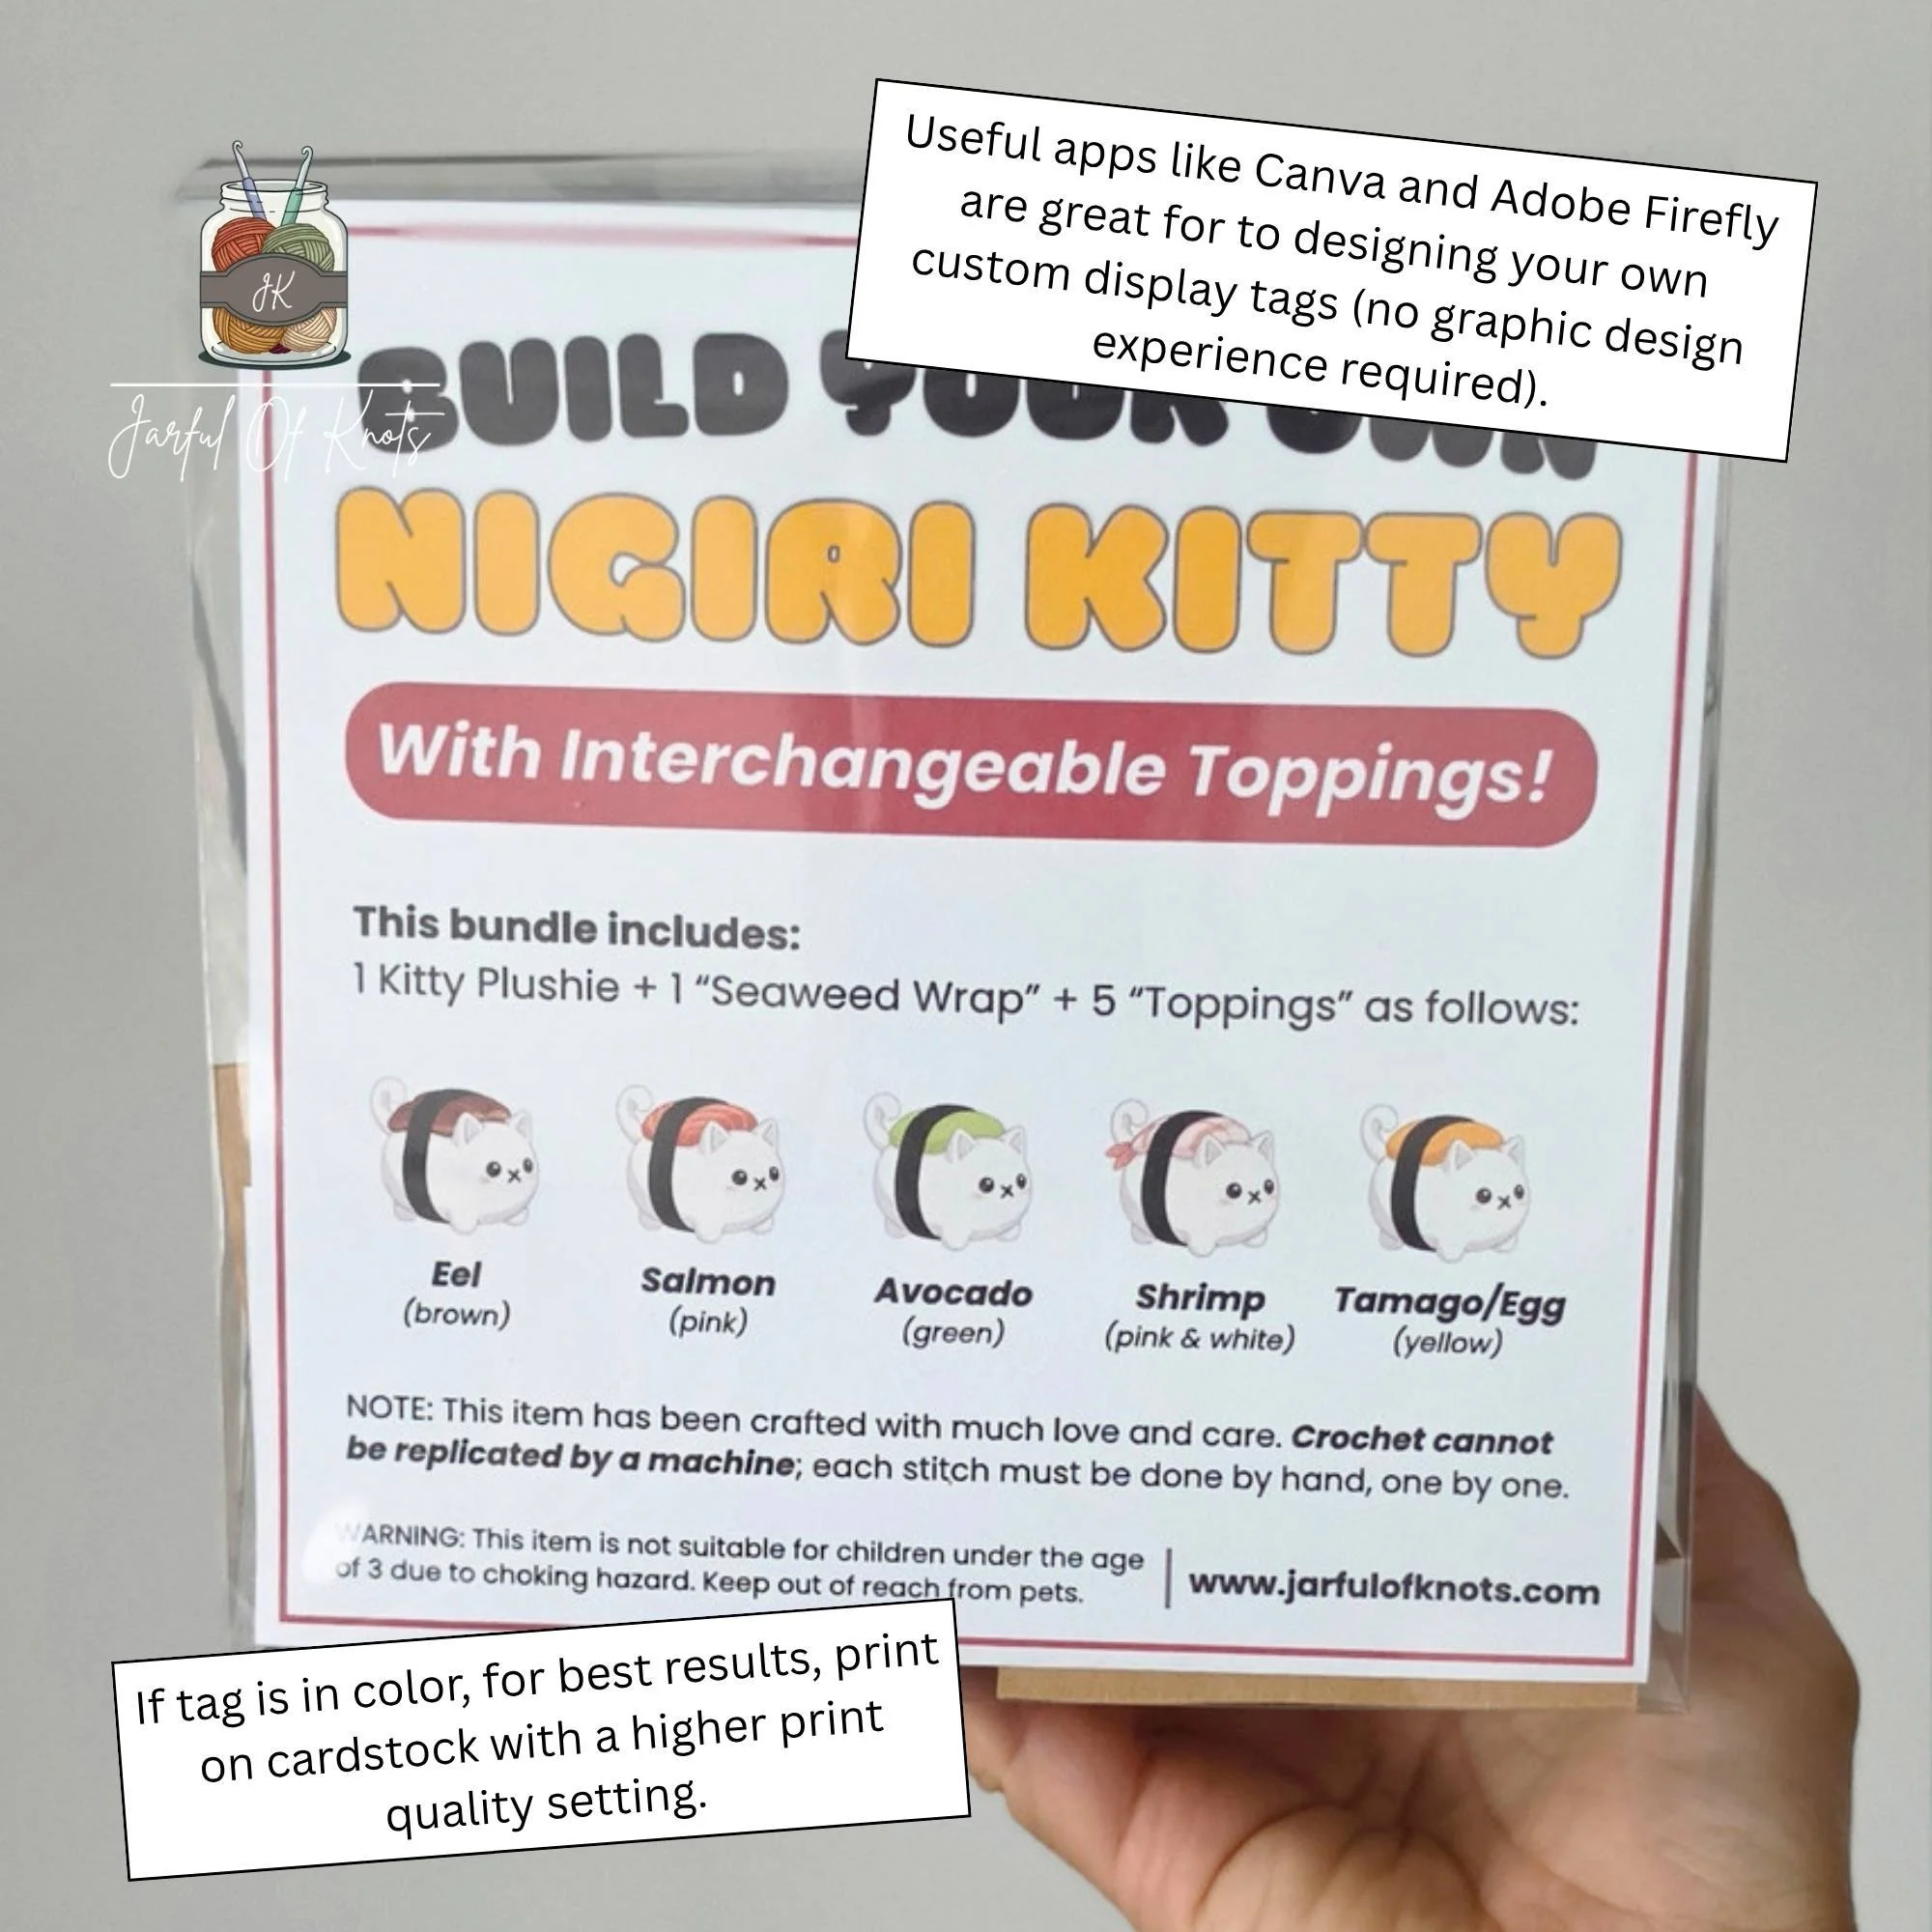
Display Tag Insert:
Since my box was 6” x 6” x 6”, I sized my tag to 5.8” x 5.8” to ensure it fit inside the box. The tag includes contents of box, care instructions, warning label, website, and cute graphics and text and is place inside of the box (facing out).
These tags were printed on cardstock in full color at the highest print quality.
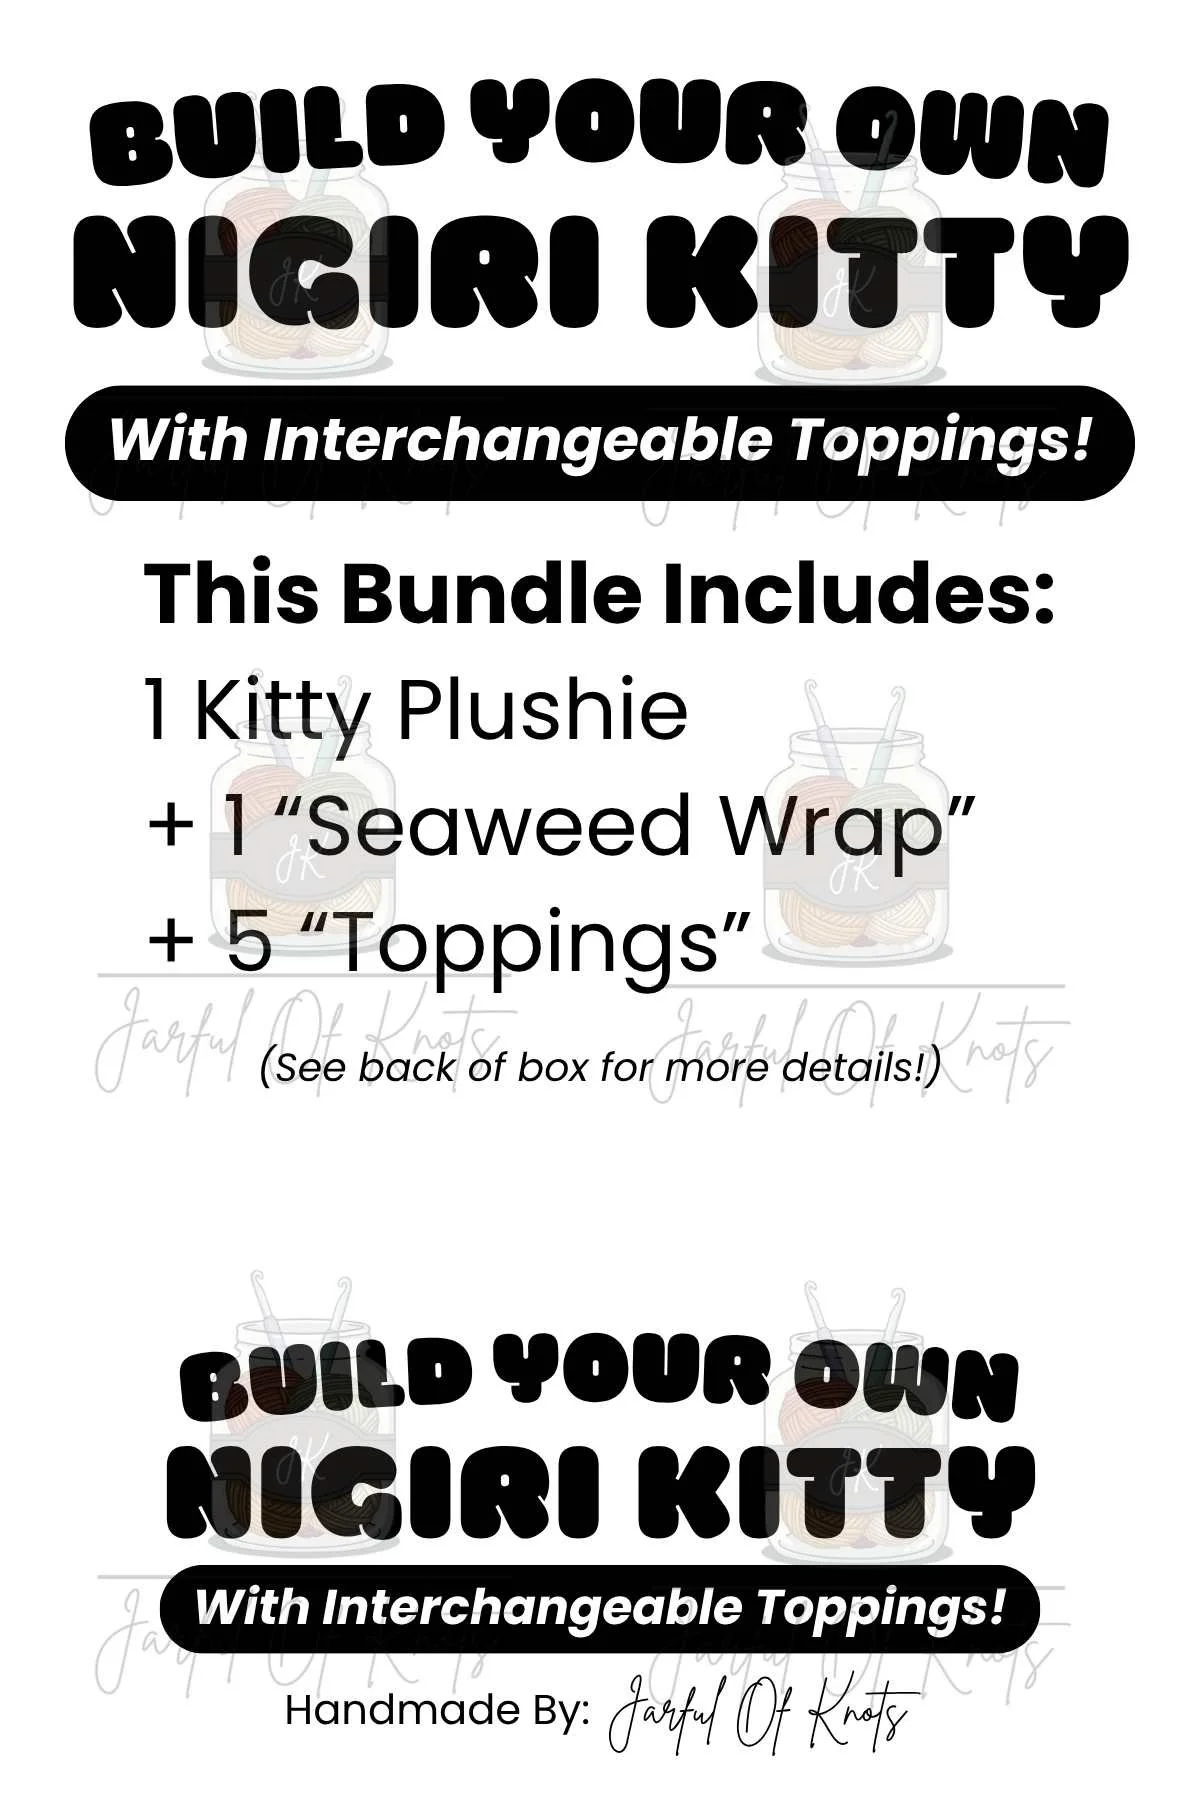
Labels
Outside Label: I designed a 4” × 6” label that could be used as both the top label and front label - see slide # 5. In designing this label, I made sure to include a wide enough gap between the 2 graphics - refer to image below.
Product Label: I designed simple product labels for my “Interchangeable Toppings” and was able to fit 8 labels onto a 4” x 6” label. I cut out each individual label.
I used my thermal shipping label printer the print the labels on standard 4”×6” shipping labels
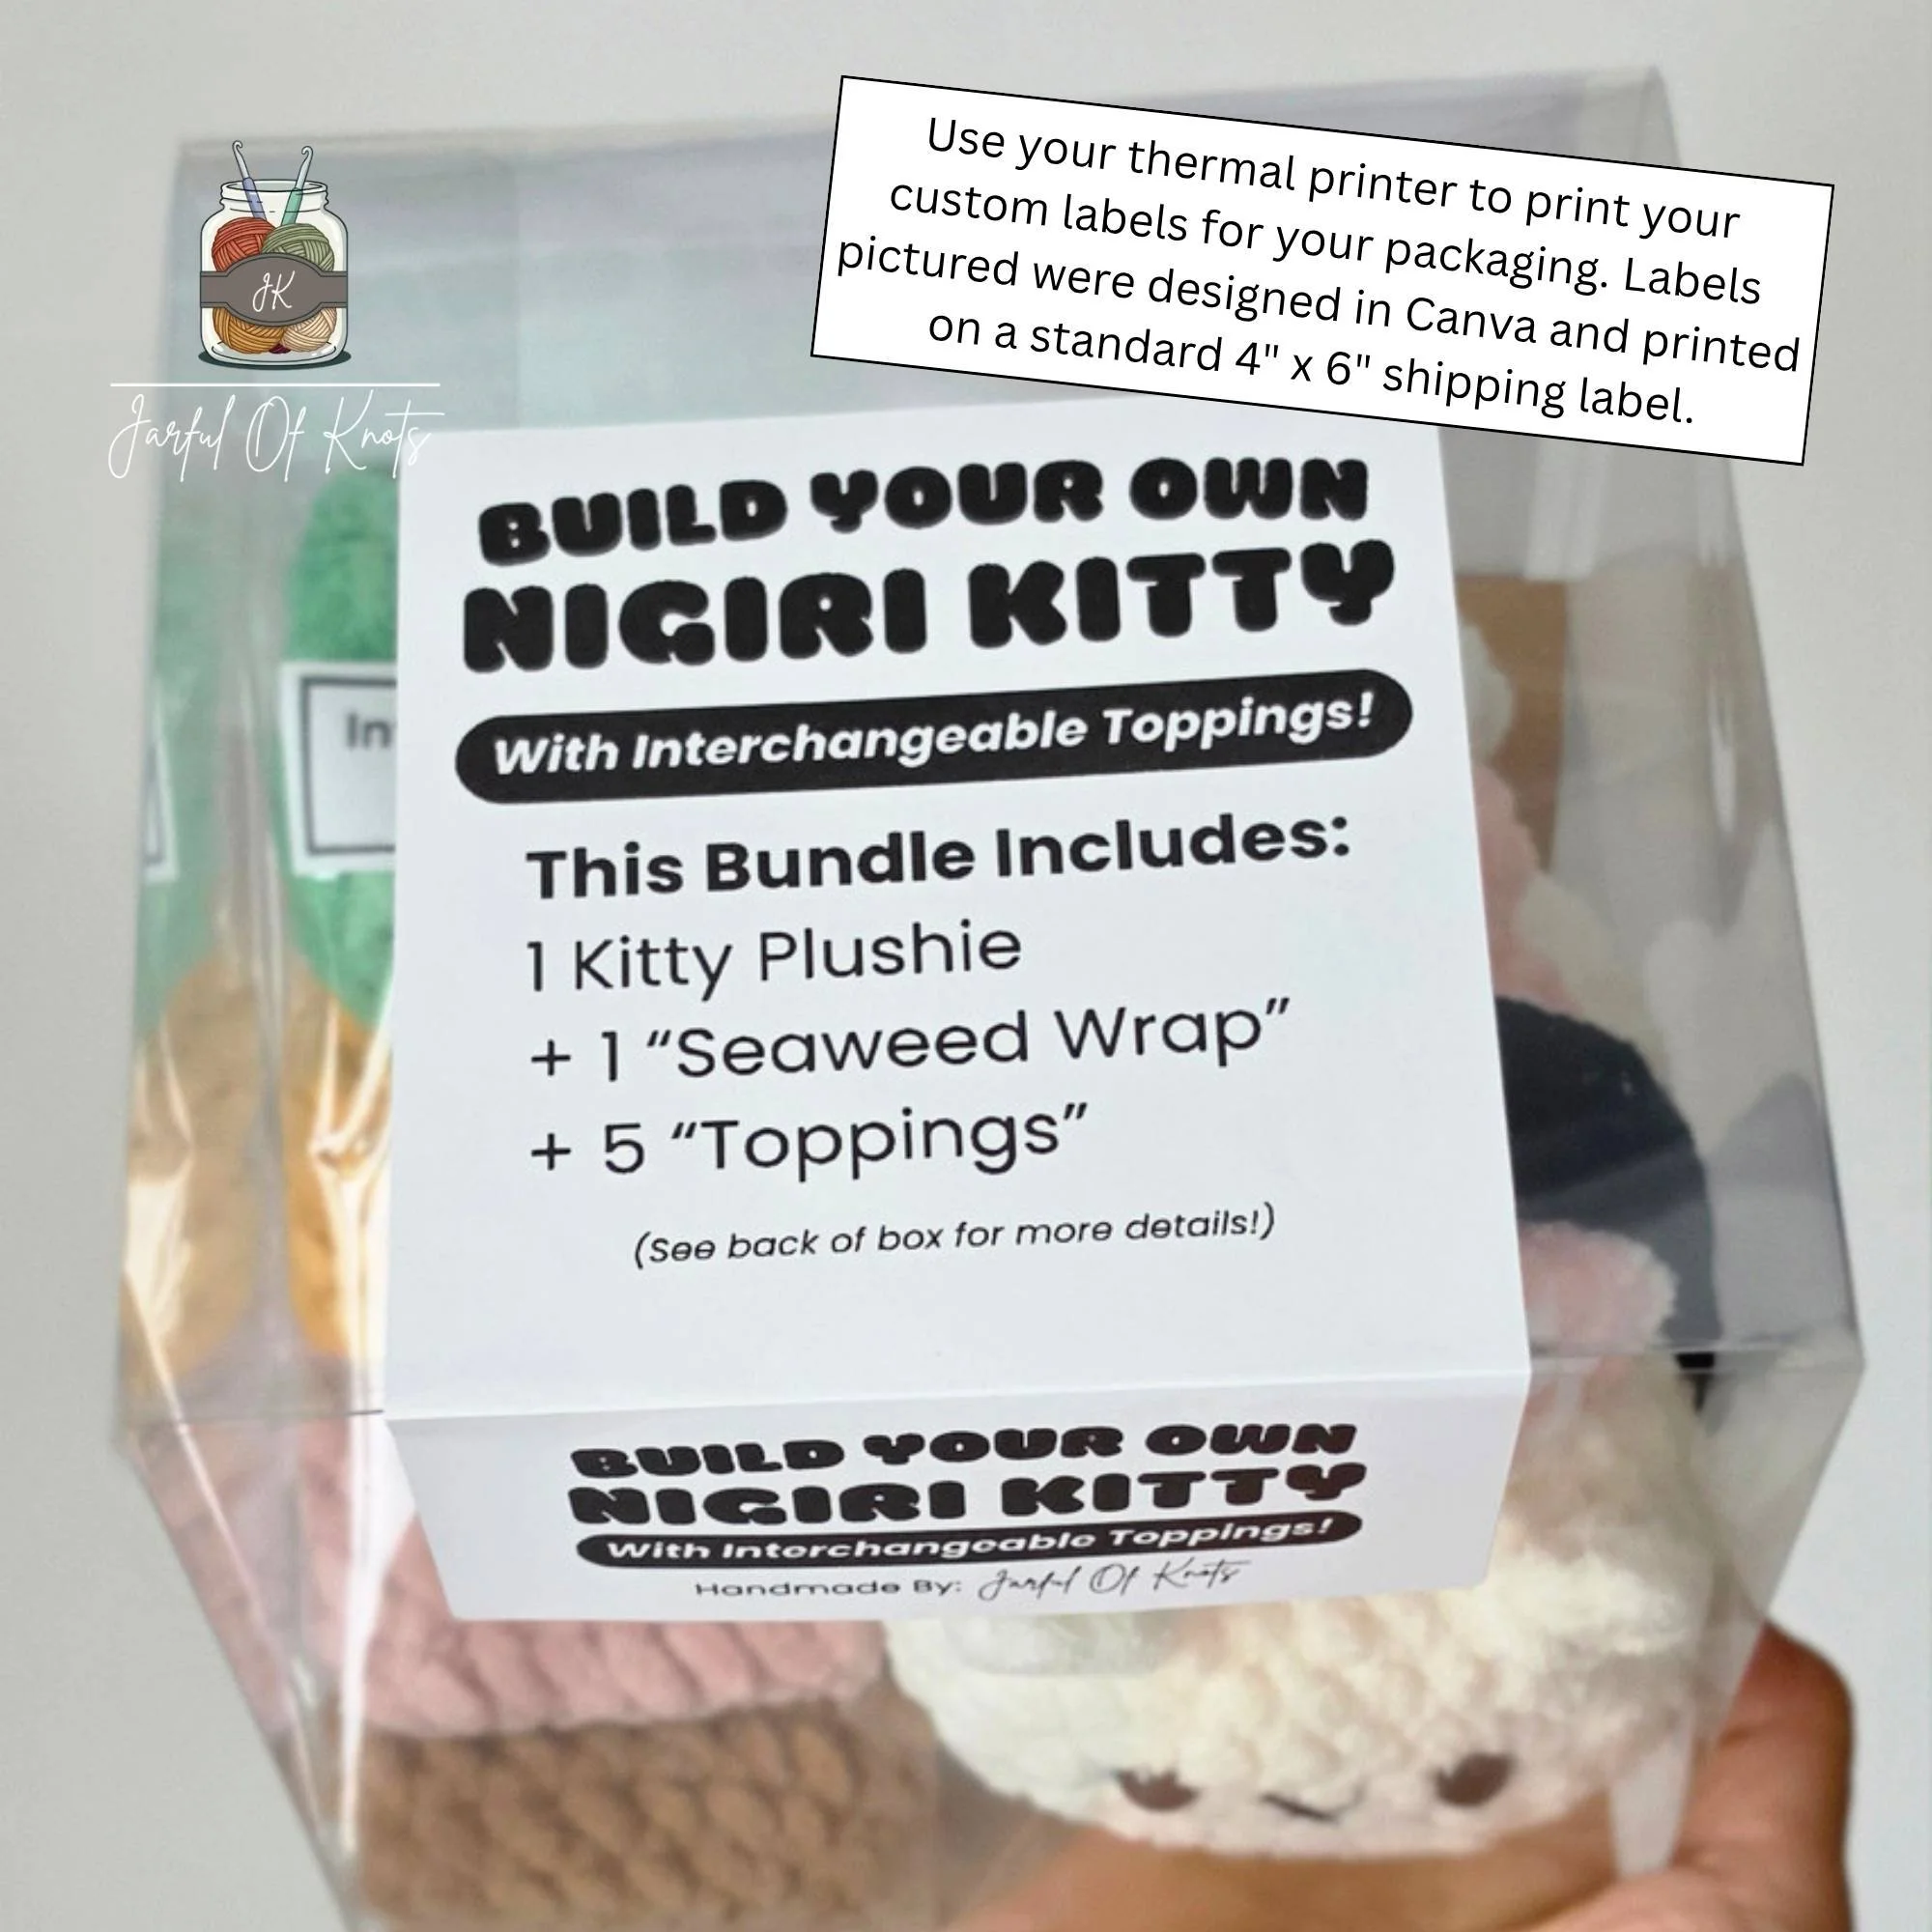
How the outside label looks like on the box.
Step 2: I used cardstock to fill in the gaps and add height and dimension to the contents.
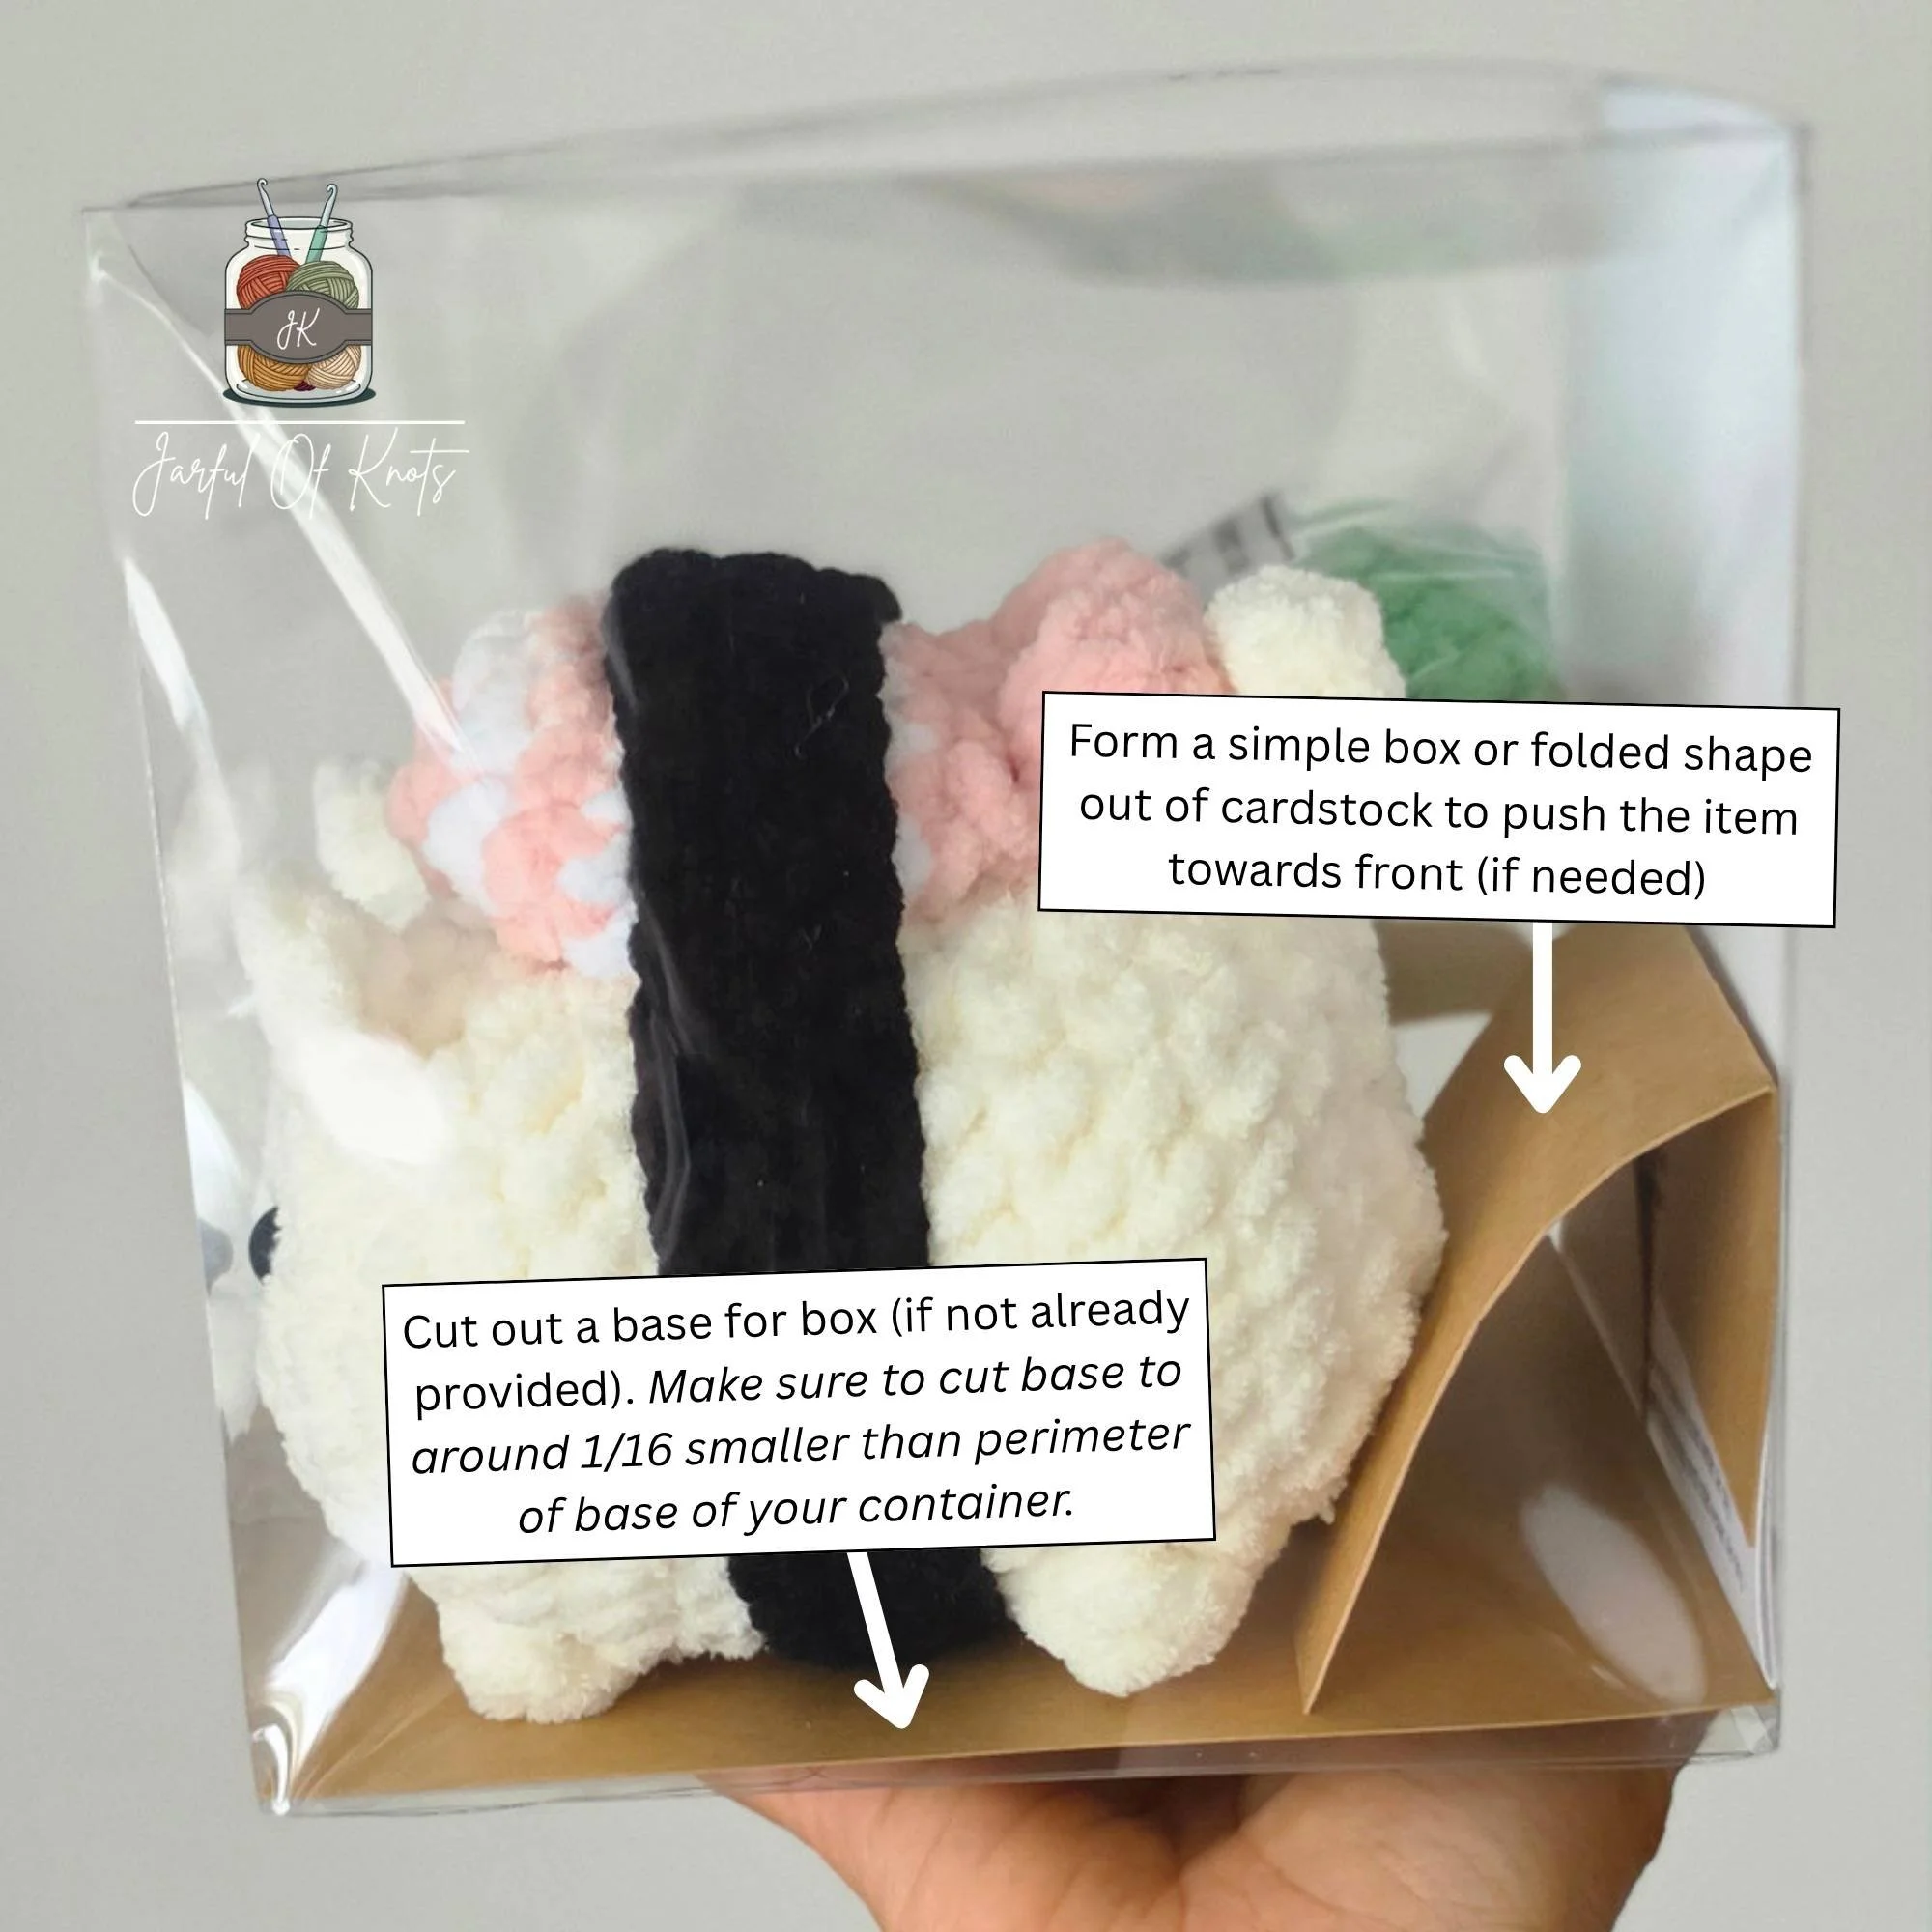
Base and Depth
NOTE: Although it’s not pictured, I realized using tape to hold the pieces in place was best after I already took these photos!
Base: My boxes did not come with a base so I cut a piece of 8.5” x 11” cardstock (heavy duty works best) to the size needed; Since the base of my box was 6” x 6,” I sized my base to about 5.8” x 5.8” (similar to my Display Tag Insert in step 1).
I used a piece of leftover cardstock (from above) and folded 1/3 of it to be placed behind my plushie; This helped to push the plushie towards the front of the box.
Other ideas: Form shapes out of the cardstock like empty boxes.
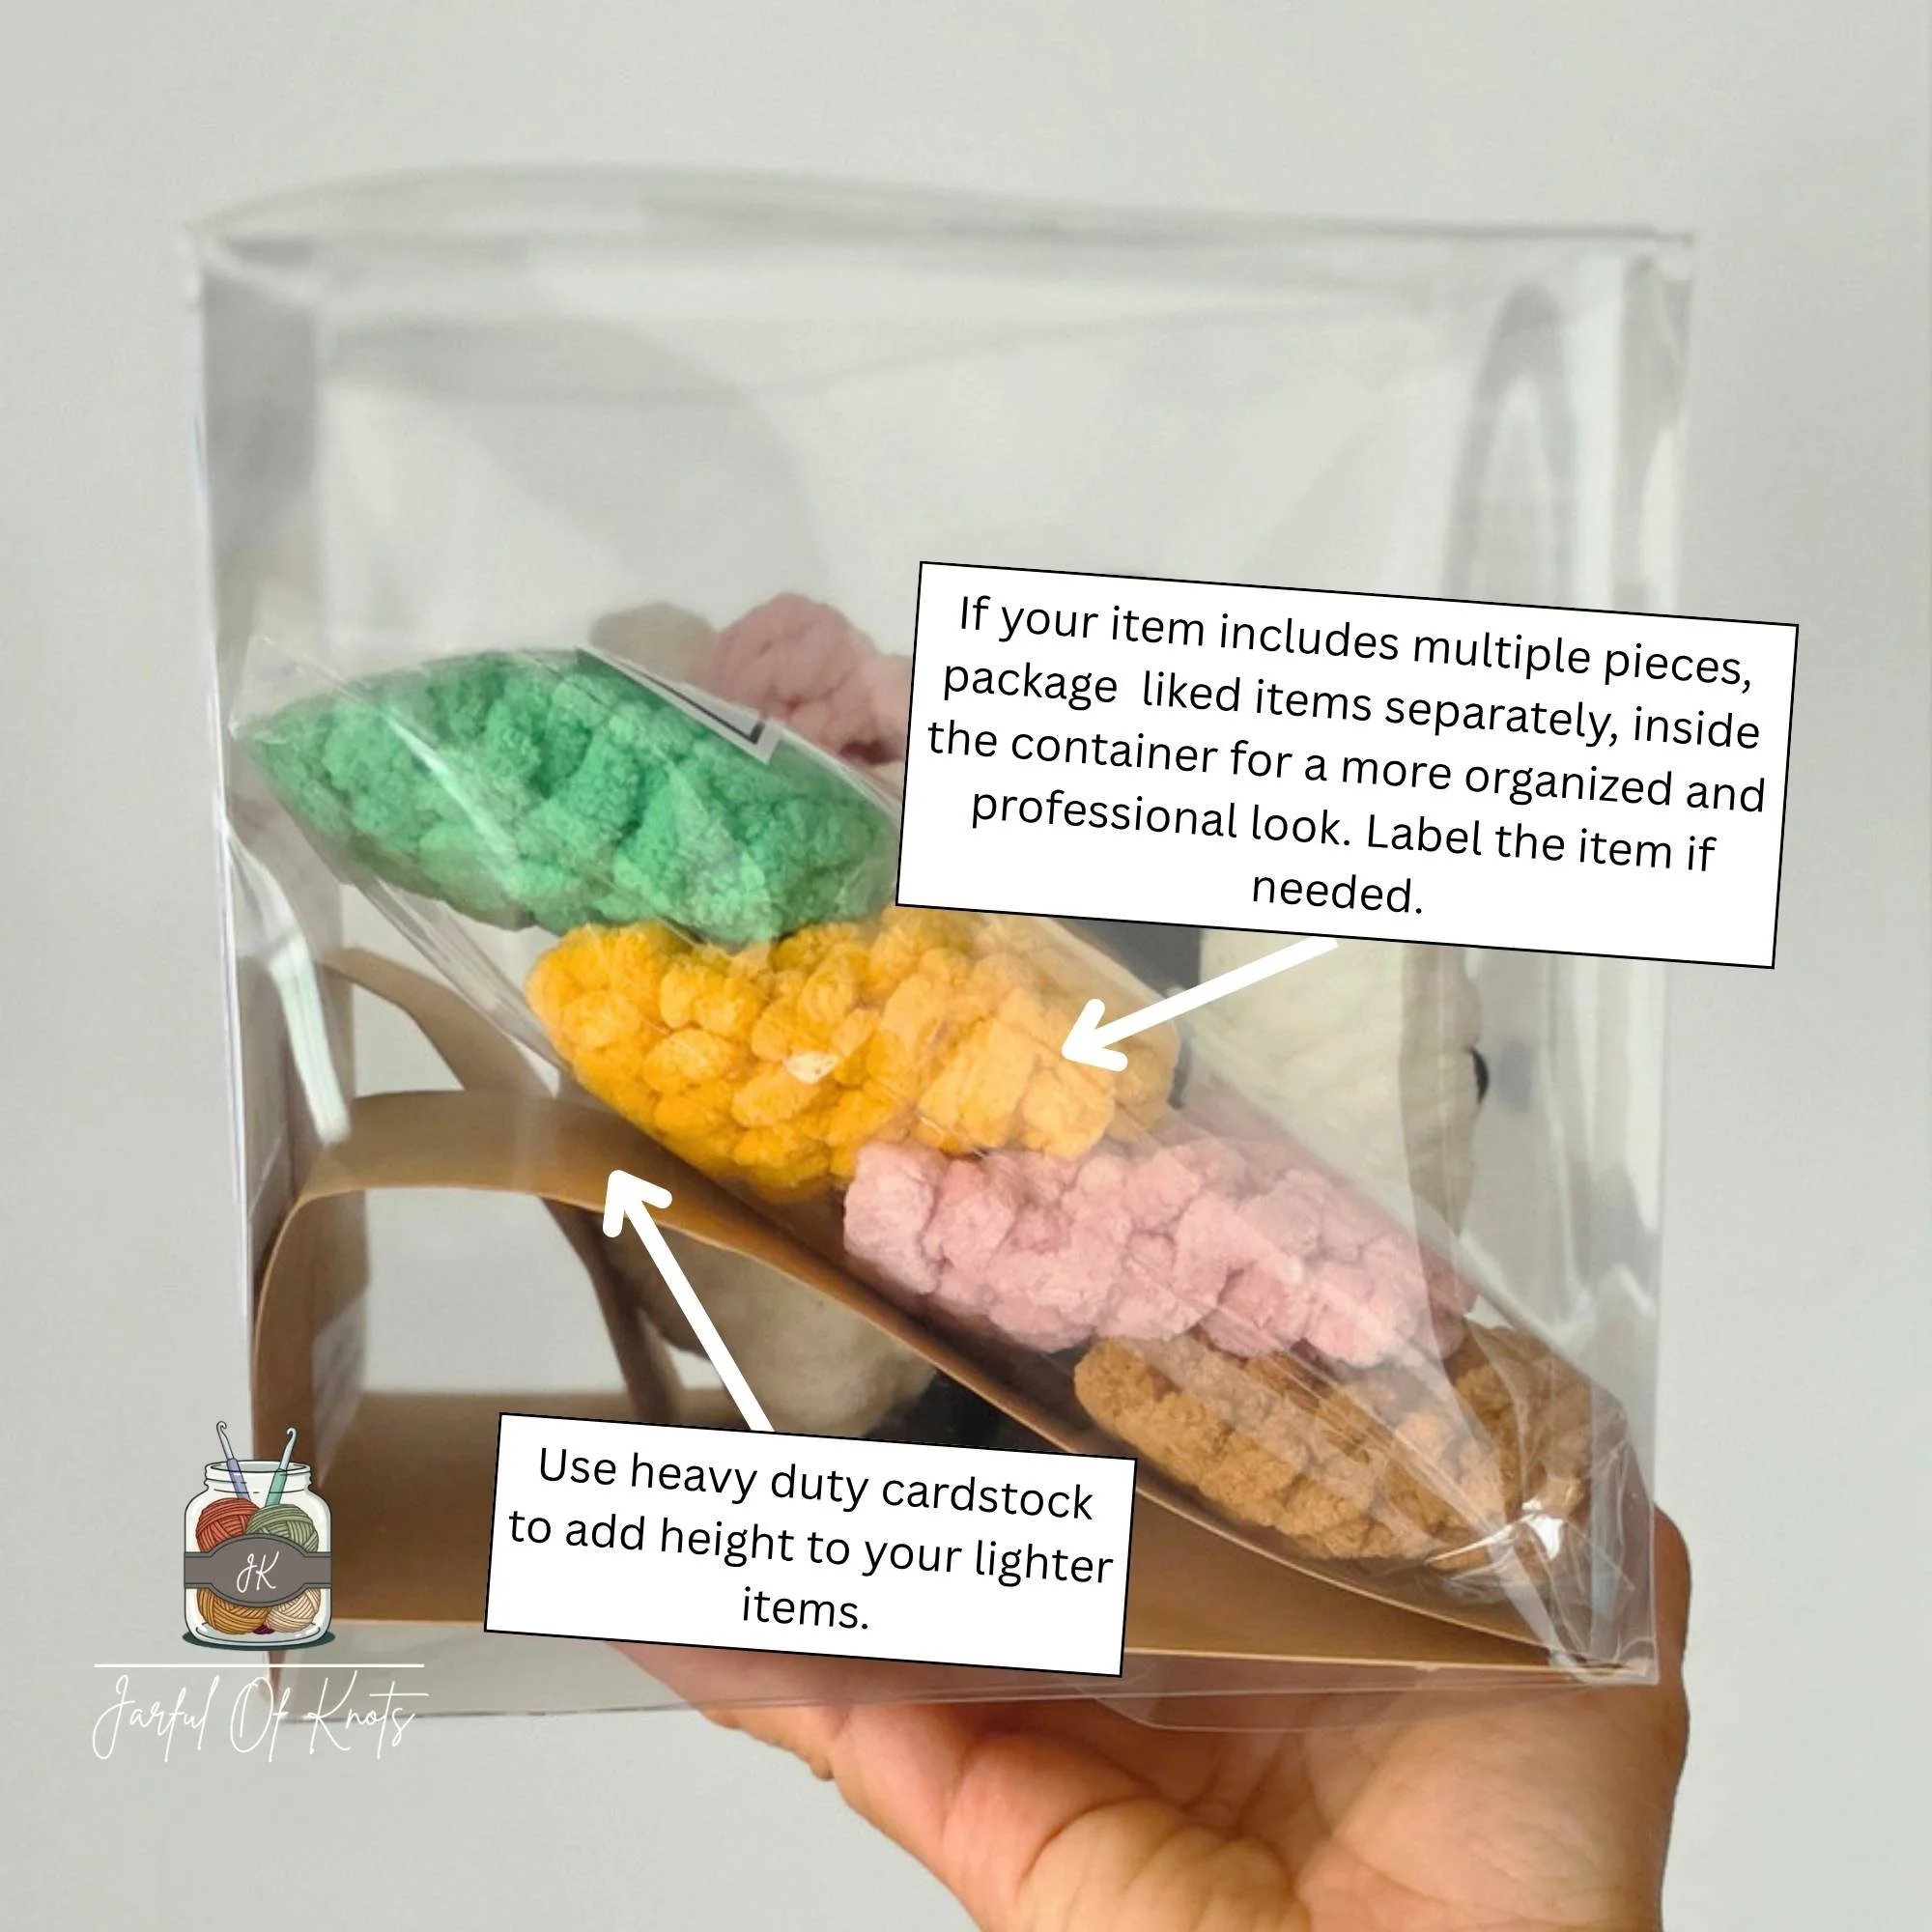
Height
My “toppings” needed some height to them or else they would be facing up and not forward. I used another strip of scrap from cutting out my base (above), to form a “shelf” for the “toppings” to sit on top of - see photo.
That’s it! I hope this post helps you when looking for creative ways to display and market your finished crochet plushies and items. I know these steps can seem a bit much but I think the effort goes a long way. If you have any feedback, questions, or any other display ideas you’d like to share, please feel free to leave it in the comments below! Happy Crafting!
NOTE: I am not selling the digital files for these display tags; This post is for information purposes only in hopes to get your “creative juices” flowing!